Growing tomatoes successfully depends on understanding your specific climate zone and adapting your approach accordingly. Whether you're dealing with short growing seasons in Zone 3 or extended heat in Zone 10, each region presents unique challenges that require different strategies. The key to thriving tomato plants is matching the right varieties, planting times, and care techniques to your local conditions rather than following generic advice.
Many gardeners struggle because they try methods designed for completely different climates. A planting schedule that works perfectly in Georgia will fail in Montana, and varieties that thrive in cool Pacific Northwest summers will drop blossoms in Arizona heat. Understanding these differences can increase yields by more than a third compared to using unsuited approaches.
This guide covers everything needed to grow tomatoes from zones 3 through 10, including variety selection, soil preparation, planting timing, season extension techniques, and pest management. The information provided helps gardeners avoid common mistakes and develop a climate-specific strategy for producing abundant, flavorful tomatoes.
Key Takeaways
- Success depends on choosing tomato varieties bred for your specific hardiness zone and climate conditions
- Planting timing and soil temperature matter more than calendar dates for healthy tomato growth
- Season extension tools and climate-adapted care techniques can significantly boost yields in any zone
Understanding Plant Hardiness Zones for Tomato Success
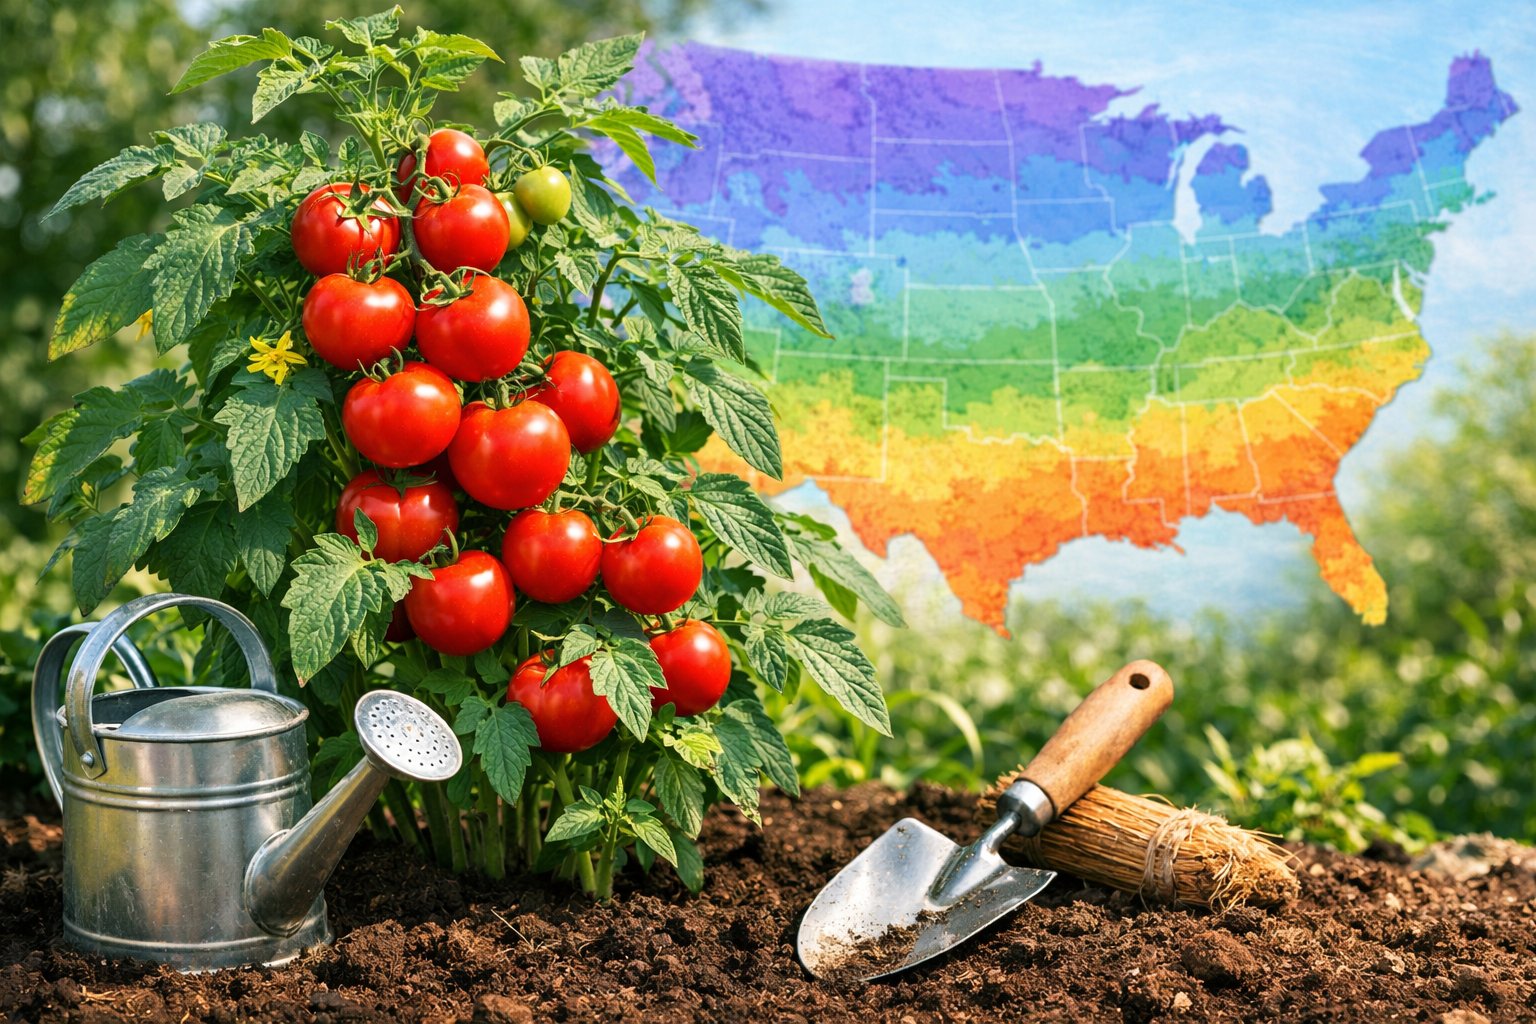
Growing tomatoes successfully starts with knowing your specific climate conditions. The USDA plant hardiness zone system provides essential information about temperature ranges, while frost dates determine the safe planting window for heat-loving tomato plants.
What Are USDA Plant Hardiness Zones?
USDA plant hardiness zones divide North America into regions based on average minimum winter temperature. Each zone represents a 10-degree F difference in the coldest temperatures a location typically experiences. The system includes 13 zones, with subzones (a and b) that further divide each zone into 5-degree F increments.
The USDA plant hardiness zone map helps gardeners select plants that can survive their local winter conditions. While tomatoes grow as annuals and complete their life cycle in one season, these zones still matter. They indicate the length of the growing season and general climate patterns. Zone 3 gardeners face short summers of 90-120 frost-free days, while zone 9b and zone 10 growers enjoy 250 or more frost-free days.
Temperature affects more than just survival. It influences when gardeners can plant, which varieties perform best, and how long the harvest season lasts.
How to Find Your Planting Zone
Gardeners can find their planting zone by entering their zip code on the USDA Agricultural Research Service website. The interactive map displays the specific zone and subzone for any location. Local Cooperative Extension offices also provide this information along with region-specific growing advice.
The plant hardiness zone map gets updated periodically as climate data accumulates. The most recent version from 2023 reflects current temperature patterns. Some areas have shifted to warmer zones compared to earlier versions of the planting zone map.
Gardeners should note their exact subzone. A zone 6a garden experiences average minimum winter temperatures of -10 to -5 degrees F, while zone 6b ranges from -5 to 0 degrees F. This difference impacts the overall growing environment for tomatoes.
The Role of Frost Dates in Tomato Planting
First and last frost dates matter more than USDA zones for annual crops like tomatoes. The last spring frost marks when it becomes safe to transplant tomatoes outdoors. The first fall frost signals the end of the growing season.
Tomato plants cannot tolerate freezing temperatures. Even a light frost damages leaves and kills young plants. Gardeners must wait until after the last spring frost date and until soil temperatures reach at least 60 degrees F before transplanting.
These dates vary by location, even within the same zone. Coastal areas, valleys, and urban heat islands all experience different frost patterns. Local Cooperative Extension offices provide average frost dates specific to each area. Gardeners should treat these as guidelines rather than guarantees, since weather varies from year to year. Checking 10-day forecasts before planting helps avoid unexpected cold snaps.
Choosing Tomato Varieties and Types Suited for Zones 3–10
Picking the right tomato variety makes the difference between a failed crop and a bountiful harvest. Growth habit, fruit type, and climate tolerance determine which tomatoes will thrive in specific zones.
Selecting Determinate vs. Indeterminate Tomatoes
Determinate tomatoes grow to a fixed height, usually 3–4 feet, and produce all their fruit within a 2–3 week period. These compact plants work well in containers, small gardens, and short growing seasons. They require minimal staking and stop growing once they set fruit at their terminal bud.
Indeterminate tomatoes continue growing and producing fruit throughout the season until frost kills them. These vining plants can reach 6–10 feet tall and need sturdy support structures like cages or stakes. Growers in zones 3–5 often prefer determinate varieties because the concentrated harvest happens before early fall frosts arrive.
Zones 6–10 benefit from indeterminate varieties that produce steady yields through longer growing seasons. Bush varieties like Bush Early Girl and Bush Champion offer determinate convenience with decent fruit size. Compact determinate types like Tiny Tim and Patio Princess suit balcony and patio gardens in any zone.
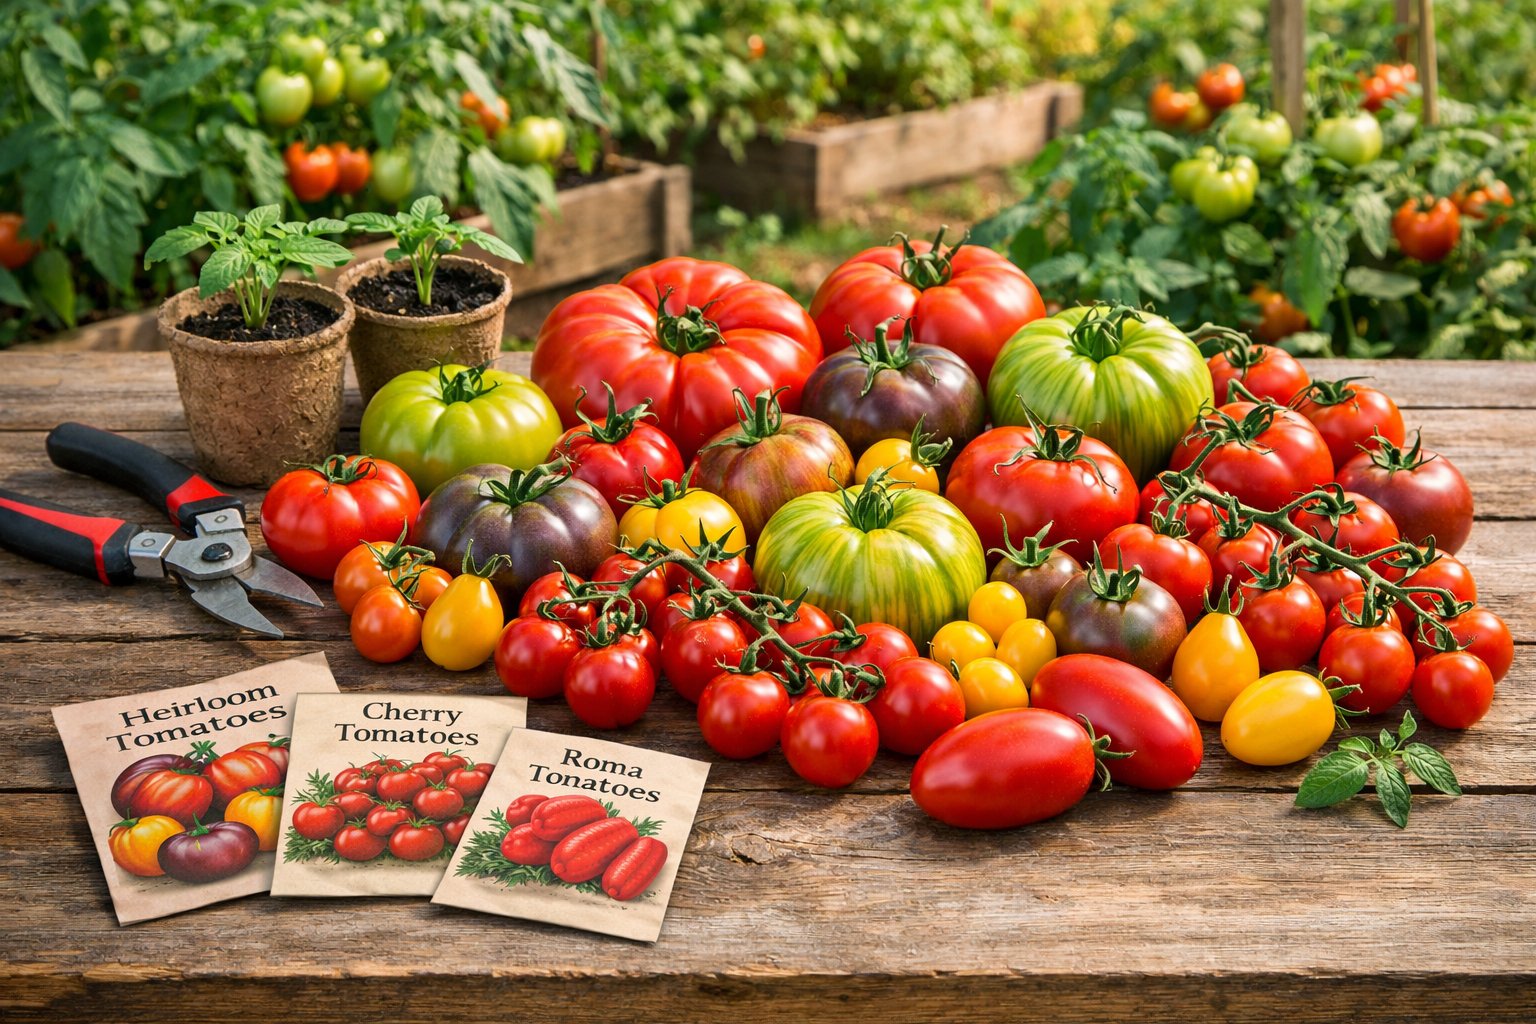
Heirloom, Hybrid, and Canning Tomatoes
Heirloom tomatoes are open-pollinated varieties passed down through generations, prized for their exceptional flavor and unique colors. Varieties like Stupice, Moskvich, and Brandywine offer distinct tastes but may lack disease resistance. These tomatoes produce seeds that grow true to type year after year.
Hybrid tomatoes result from crossing two different parent plants to create disease-resistant, high-yielding varieties. Early Girl and Celebrity exemplify hybrids bred for reliability and consistent performance across multiple zones. Hybrids cannot reproduce true from saved seeds.
Canning tomatoes, also called paste or plum tomatoes, contain less water and more flesh than slicing types. San Marzano stands as the gold standard for sauce making, with meaty texture and few seeds. Roma and Amish Paste also excel for preserving, canning, and cooking down into thick sauces. These varieties typically produce determinate harvests perfect for bulk processing.
Best Tomato Varieties for Cold and Warm Zones
Zone 3 varieties must mature in 45–60 days to beat early frosts. Sub Arctic Plenty ripens in just 45–50 days and tolerates cool soil temperatures. Siberian, Glacier, and Stupice all produce fruit within 50–60 days and handle temperature swings common in northern gardens.
| Variety | Days to Harvest | Best Zones | Type |
|---|---|---|---|
| Sub Arctic Plenty | 45–50 | 3–4 | Determinate |
| Early Girl | 50–55 | 3–8 | Indeterminate |
| Celebrity | 70–75 | 5–10 | Determinate |
| Cherokee Purple | 80–90 | 6–10 | Indeterminate |
Zones 4–6 support both early and mid-season varieties. Early Girl produces medium slicing tomatoes in 50–55 days. Moskvich and Red Russian offer cold tolerance with rich flavor for these transitional zones.
Zones 7–10 accommodate heat-loving, full-season tomatoes. Cherokee Purple, Brandywine, and Beefsteak need 80–90 days but deliver massive, flavorful fruits. Heat-tolerant hybrids like Phoenix and Heatwave resist blossom drop in hot southern summers where temperatures exceed 90°F regularly.
Tomato Planting and Care By Climate Zone
Success with tomatoes depends heavily on understanding your specific USDA plant hardiness zone and adjusting planting times and care practices accordingly. Each zone presents unique challenges related to frost dates, temperature extremes, and growing season length that directly impact how gardeners should approach tomato cultivation.
When to Plant Tomatoes in Different Zones
Timing tomato planting correctly prevents frost damage and ensures plants have enough warm weather to produce fruit. Gardeners should always reference both their USDA zones and local first and last frost dates rather than relying on calendar dates alone.
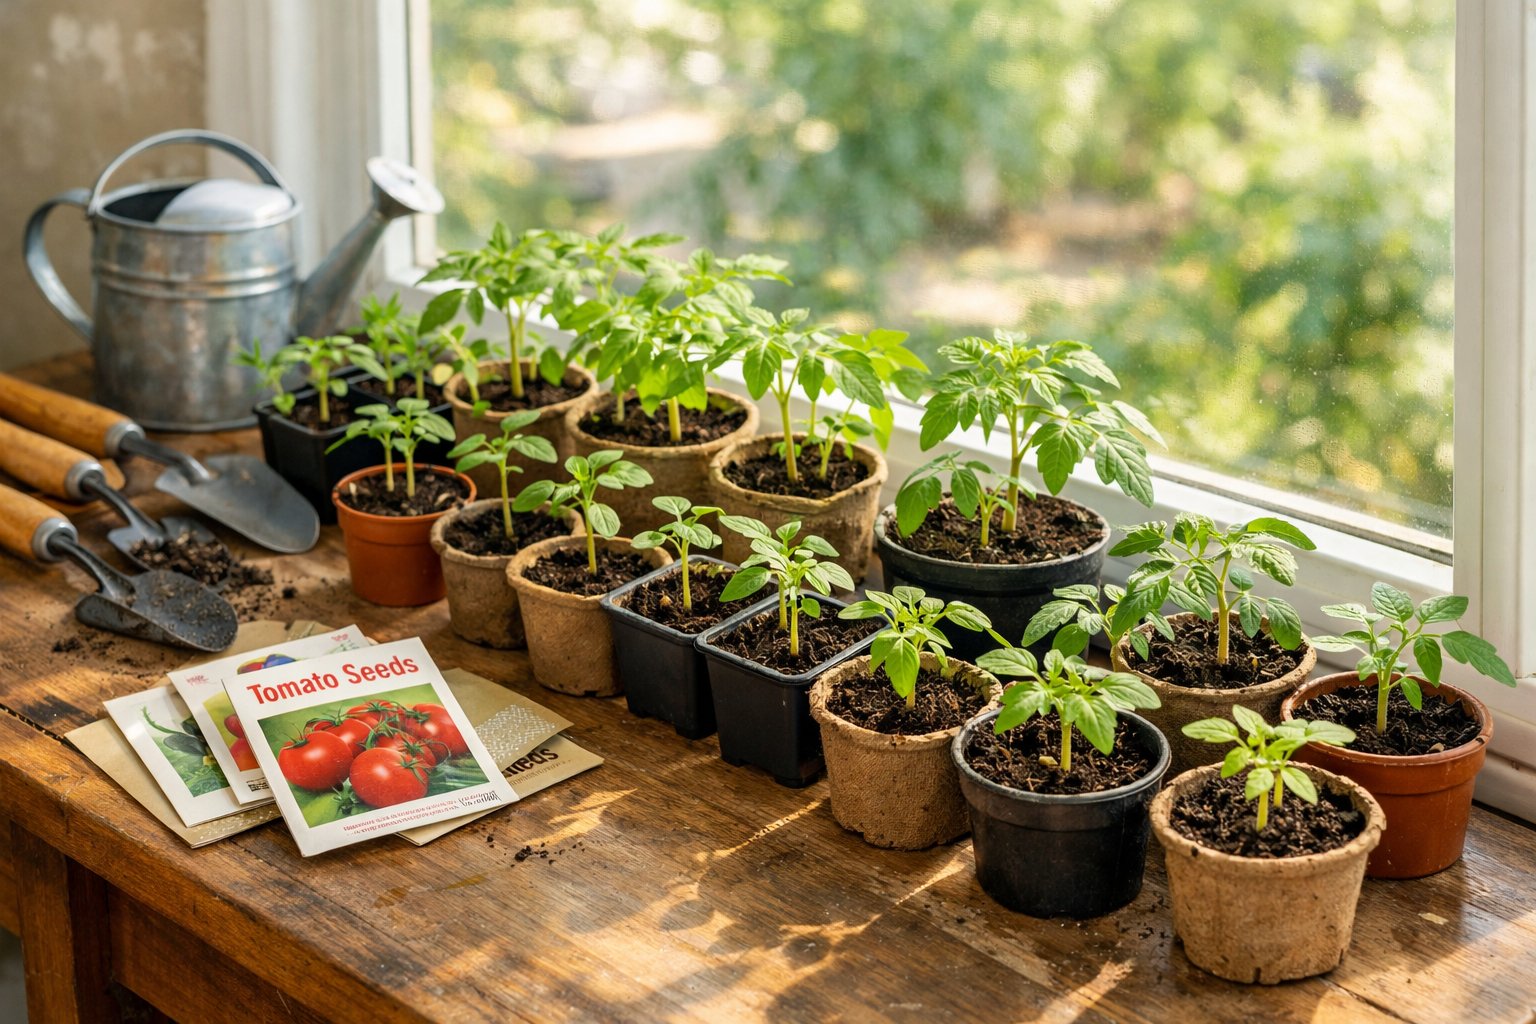
Northern Zones (3-5): Start seeds indoors 6-8 weeks before the last frost date. Transplant outdoors only when soil temperatures consistently reach 60°F, typically 1-2 weeks after the last frost. These zones have the shortest growing season, usually 90-120 frost-free days.
Central Zones (6-8): Begin seeds indoors 4-6 weeks before the last frost. Plants can go outside when nighttime temperatures stay above 50°F. These zones offer 150-200 frost-free days.
Southern Zones (9-10): Plant tomatoes in early spring (February-March) or fall (August-September) to avoid extreme summer heat. Zone 9b and other southern planting zones often allow for year-round growing with proper variety selection. Winter planting works in frost-free areas.
Zone-Specific Care Tips: Zones 3–5
Cold climate gardeners need to focus on season extension and rapid growth strategies. Black plastic mulch warms soil by 5-10°F and accelerates early growth. Row covers or Wall-o-Water protectors shield young plants from unexpected late spring frosts.
Choose determinate or short-season varieties that mature in 60-75 days. Popular options include 'Early Girl', 'Stupice', and 'Sub Arctic Plenty'. These varieties produce fruit before the first fall frost arrives.
Raised beds improve drainage and warm up faster than ground-level gardens. Add compost to cold, heavy soils to improve structure. Start hardening off seedlings 7-10 days before transplanting by gradually exposing them to outdoor conditions.
Water deeply but less frequently once plants establish. Cold-zone gardeners should monitor nighttime temperatures in fall and harvest all fruit, including green tomatoes, before the first frost hits.
Zone-Specific Care Tips: Zones 6–8
These moderate zones offer the most flexibility for growing standard tomato varieties. Both determinate and indeterminate plants thrive with proper support. Gardeners can expect 150-200 frost-free days for fruit production.
Plant spacing matters more in these zones where plants reach full size. Space determinate varieties 24 inches apart and indeterminate varieties 36 inches apart. Install sturdy stakes or cages at planting time to avoid root damage later.
Consistent watering prevents blossom end rot and cracking. Provide 1-2 inches of water weekly through drip irrigation or soaker hoses. Mulch with 2-3 inches of organic material to retain moisture and regulate soil temperature.
Watch for common diseases like early blight and septoria leaf spot, which thrive in moderate humidity. Remove lower leaves that touch the ground and ensure good air circulation between plants.
Zone-Specific Care Tips: Zones 9–10
Heat management becomes the primary challenge in southern zones. Temperatures above 90°F cause blossom drop and reduce fruit set. Gardeners should use 30-50% shade cloth during peak summer months to protect plants.
Select heat-tolerant varieties bred for southern conditions. 'Phoenix', 'Heatmaster', and 'Florida 91' resist common heat-related problems. These varieties set fruit more reliably when temperatures climb.
Drip irrigation delivers water directly to roots while keeping foliage dry, reducing disease pressure. Water deeply in early morning to prepare plants for hot afternoons. Sandy soils common in zone 9b require more frequent watering than clay soils.
Apply 3-4 inches of organic mulch to cool soil temperatures by 10-15°F. Plant spring tomatoes early (February-March) and fall crops in late summer (August-September) to avoid the hottest months when fruit production stops.
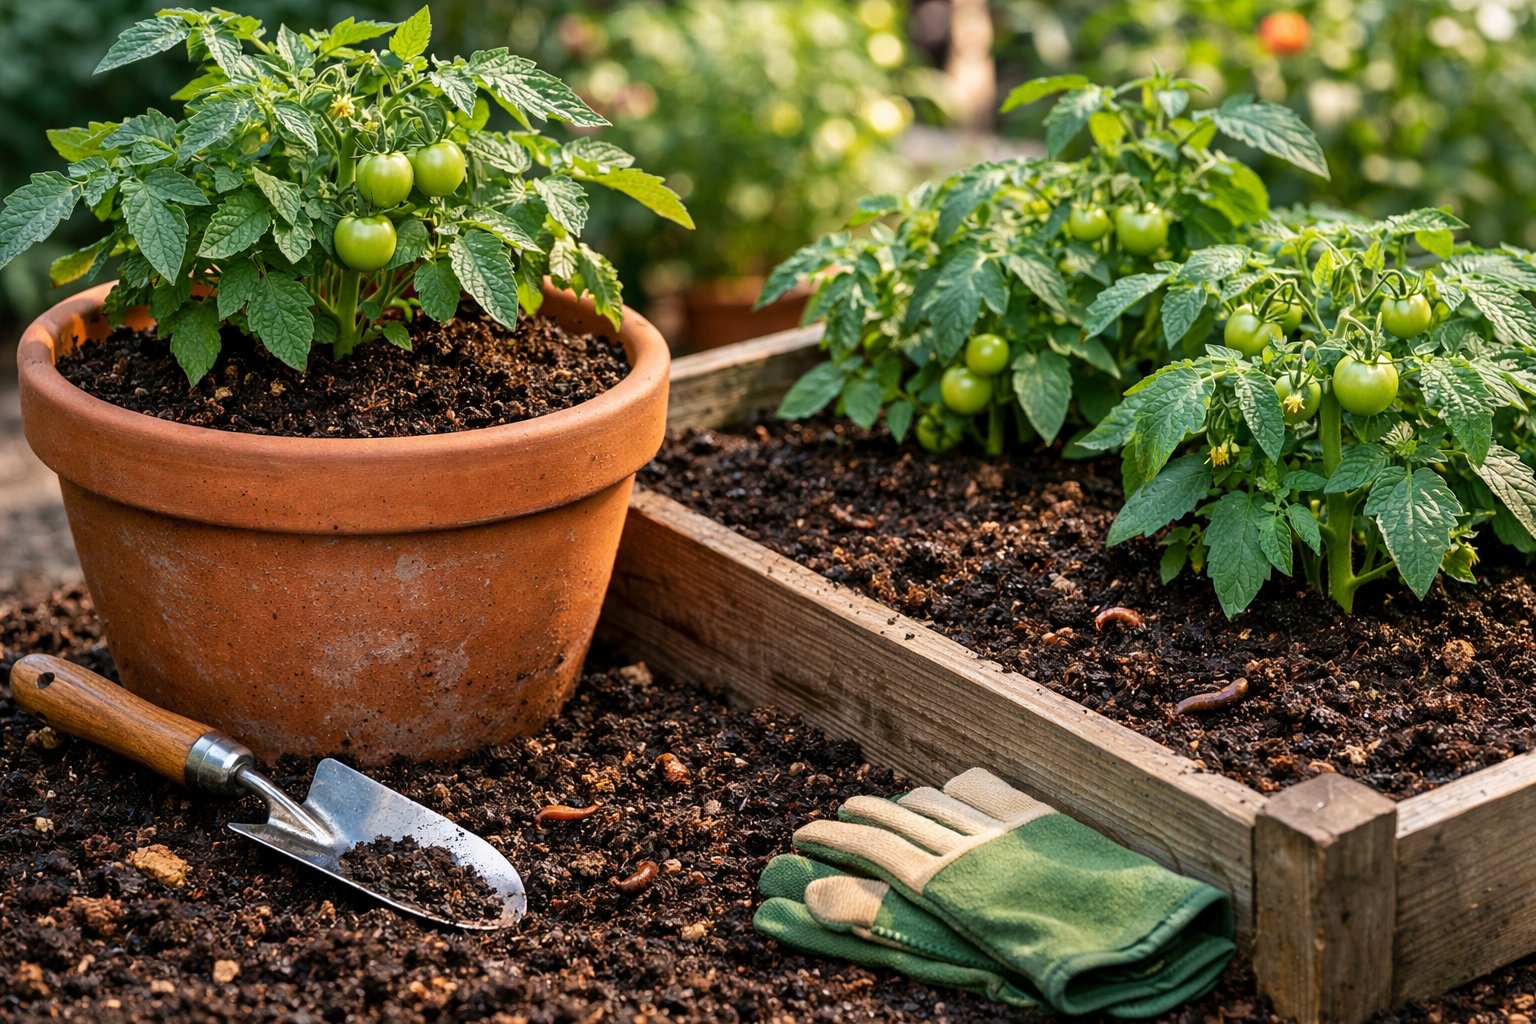
Soil Preparation and Raised Bed Strategies
Tomatoes need specific soil conditions and proper bed construction to produce healthy yields. A 50/50 mix of quality topsoil and compost creates the foundation, while bed dimensions of 18-24 inches deep give roots enough room to develop fully.
Selecting Ideal Soil and Amendments
The right soil mix makes the difference between weak plants and strong producers. Gardeners should combine equal parts screened topsoil and finished compost by volume. This blend provides nutrients while maintaining good drainage.
For beds deeper than 16 inches, a three-way mix works better. Combine 34% topsoil, 33% coarse sand, and 33% compost. The sand improves drainage without sacrificing fertility.
Tomatoes grow best when soil pH stays between 6.0 and 6.8. A soil test shows exact pH levels and tells growers what amendments to add. Agricultural lime raises pH in acidic soil. Elemental sulfur lowers pH in alkaline conditions.
Adding perlite to the mix improves both drainage and aeration. It also brings trace minerals that support plant health. A 2-3 inch layer of compost on top feeds beneficial microbes and keeps moisture levels steady through the season.
Building and Siting Raised Beds
Bed location affects harvest size before the first seed goes in the ground. The site needs 6-8 hours of direct sun each day. Southern exposures work best in northern areas.
Standard beds measure 4 feet wide by 6-12 feet long. This width lets gardeners reach the center from either side without stepping on soil. A 4x8 bed fits most gardens well.
Depth matters more than most growers think. Beds need at least 12 inches of soil, but 18-24 inches delivers better results. Deeper soil supports stronger root systems and cuts watering needs. Research shows that beds 18 inches or deeper produce 20-25% more fruit.
Place beds at least 10-15 feet away from mature trees. Tree roots compete for water and nutrients, reducing yields by up to 55%. Position beds on slightly sloped ground or raise them 3-8 inches high to improve drainage.
Materials and Tools for Tomato Beds
Cedar and redwood resist rot naturally and last 10-20 years without treatment. Pressure-treated lumber costs less and lasts 15+ years. Metal frames outlast wood by decades, with lifespans exceeding 20 years.
Composite materials combine recycled content with long-term durability. They resist weathering and maintain their shape through many seasons.
| Material Type | Expected Lifespan | Best Feature |
|---|---|---|
| Cedar/Redwood | 10-20 years | Natural rot resistance |
| Pressure Treated | 15+ years | Cost-effective durability |
| Metal Frames | 20+ years | Maximum longevity |
| Composite | 20+ years | Low maintenance |
Growers need basic tools to build and fill beds. A drill assembles frames quickly. A level ensures even construction. Wheelbarrows move soil efficiently. Garden hoses or drip irrigation systems deliver consistent water to plants throughout the growing season.
Tomato Growing Essentials: Planting, Watering, and Support
Getting the fundamentals right makes the difference between struggling plants and a productive tomato harvest. Proper planting depth encourages strong root systems, consistent watering prevents common fruit problems, and sturdy support keeps plants healthy throughout the growing season.
Planting Techniques for Healthy Roots
Tomato plants develop roots along their stems when buried deep in the soil. This trait allows growers to create stronger plants by using specific planting methods.
Deep Planting Method: Remove the lower leaves and bury two-thirds of the stem when transplanting. The buried portion will sprout new roots within 7-10 days. This technique works well for all tomato varieties and helps anchor plants against wind.
Trench Planting Method: For leggy seedlings, dig a shallow trench instead of a hole. Lay the plant horizontally with only the top 4-6 inches of foliage above ground. Gently bend the exposed stem upward and cover the rest with soil.
Space plants according to their growth type. Bush varieties need 24 inches between plants. Vining types require 36 inches for proper air circulation.
Add a handful of bone meal or balanced fertilizer to the planting hole. Mix it with soil before setting the plant in place. Water immediately after planting to eliminate air pockets around roots.
Watering Consistently and Correctly
Inconsistent watering causes blossom end rot, fruit cracking, and stressed plants. Tomatoes need 1-2 inches of water per week through rainfall or irrigation.
Deep Watering Schedule: Water 2-3 times weekly rather than daily. Each session should soak the soil 6-8 inches deep to encourage deep root growth. Shallow, frequent watering creates weak root systems near the surface.
Morning watering works best because foliage dries quickly, reducing disease risk. Avoid overhead watering when possible—wet leaves promote fungal infections.
Moisture Monitoring: Check soil moisture by inserting a finger 2-3 inches into the ground. Water when the top few inches feel dry but before plants show wilting.
Apply 2-3 inches of mulch around plants to maintain even soil moisture. Straw, shredded leaves, or wood chips all work well. Keep mulch 2 inches away from the stem to prevent rot.
Container-grown tomatoes dry out faster than garden plants. They may need daily watering during hot weather.
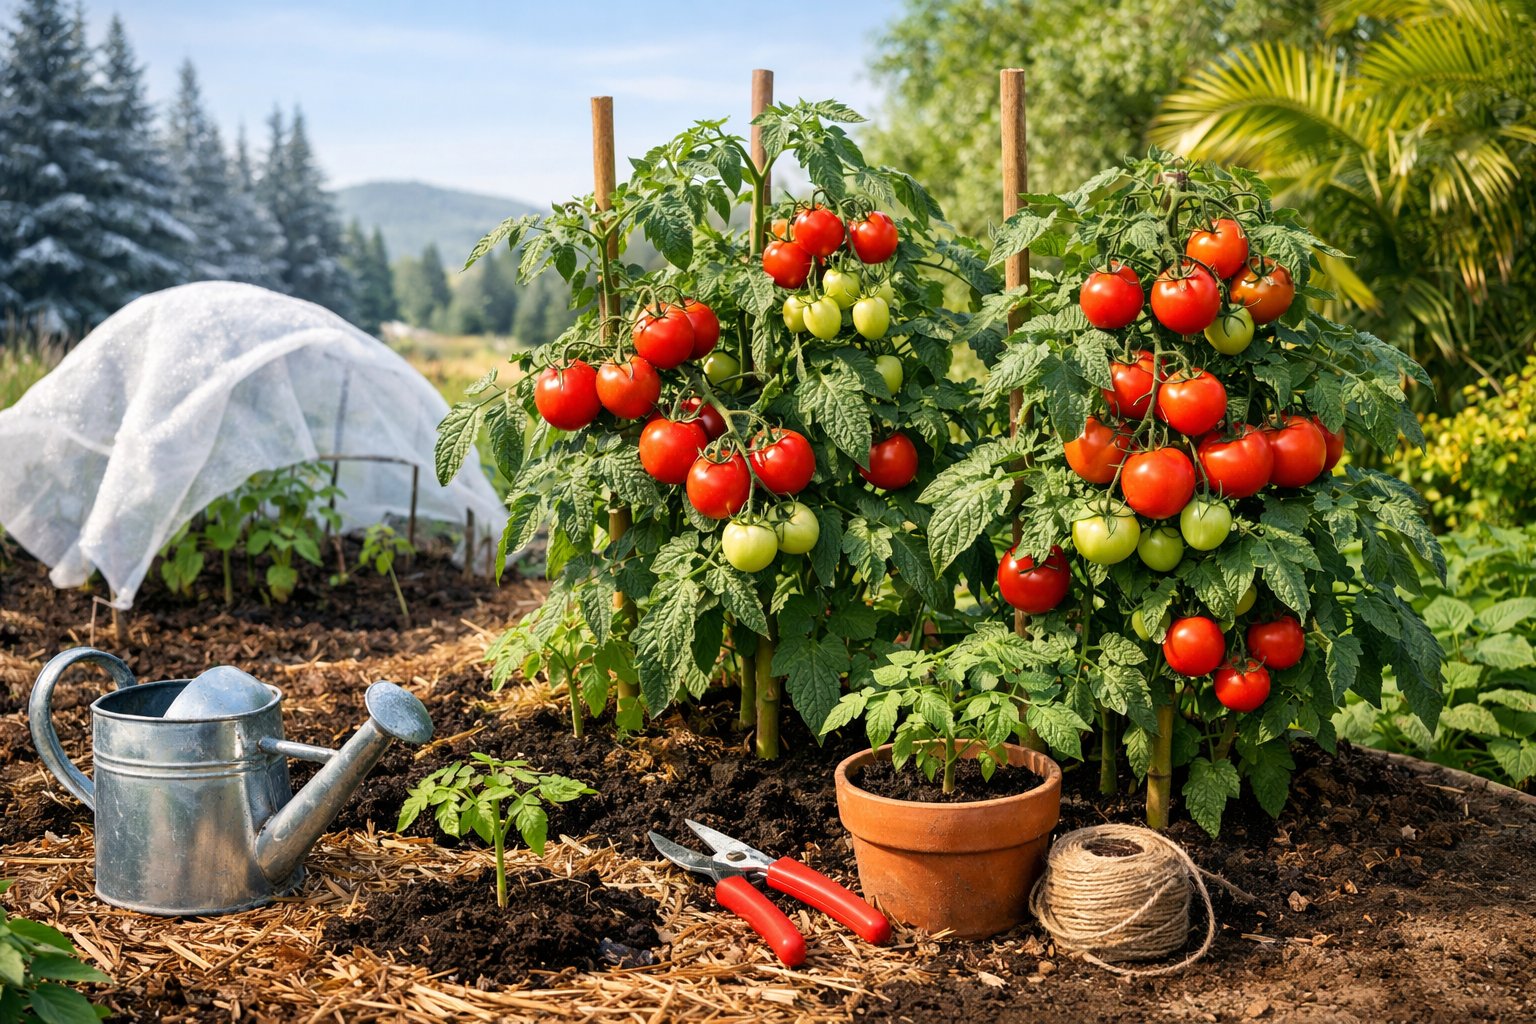
Staking, Caging, and Supporting Tomato Plants
Support systems keep fruit off the ground, improve air circulation, and make harvesting easier. Different tomato varieties need different support methods.
Stakes: Drive 6-8 foot tall stakes 12 inches into the ground at planting time. Tie the main stem to the stake every 8-10 inches using soft fabric strips or garden twine. This method works well for indeterminate varieties that growers prune to 1-2 main stems.
Cages: Wire cages should be at least 5 feet tall and 18 inches wide for vining types. Place cages at planting time to avoid disturbing roots later. Standard tomato cages from stores are too small for most varieties—consider building custom cages from concrete reinforcing wire.
Trellises: Install a sturdy trellis made from wood or metal posts with horizontal wires or strings. Weave plants through the support or tie them loosely as they grow. This system maximizes vertical space for multiple plants.
Bush varieties can grow without support but produce cleaner fruit when caged. Install supports early before plants get large and unwieldy.
Pest and Disease Management for Tomatoes
Tomato plants face threats from large caterpillars that can strip foliage overnight, fungal diseases that spread rapidly in wet conditions, and animals that raid ripe fruit. Success depends on early detection and quick action using the right methods for each problem.
Preventing and Controlling Tomato Hornworms
Tomato hornworms are large green caterpillars that can reach 4 inches long and devour entire leaves and stems in days. These pests blend in with foliage due to their bright green color and white diagonal stripes. Gardeners should inspect plants weekly, checking the undersides of leaves and looking for dark droppings on lower leaves as a sign of feeding above.
Handpicking works well for small gardens. The caterpillars are safe to touch and can be dropped into soapy water. Natural predators include parasitic wasps that lay eggs on hornworms, creating small white cocoons on their backs. Plants hosting these cocoons should be left alone since the wasps will continue controlling future hornworm populations.
Bacillus thuringiensis (Bt) is an organic spray that targets caterpillars without harming beneficial insects. It must be applied when hornworms are small for best results. Gardeners should spray in early evening and reapply after rain.
Identifying and Managing Blight and Leaf Spot
Late blight causes dark, water-soaked spots on leaves that spread rapidly in cool, wet weather. White fuzzy growth may appear on leaf undersides. This disease can destroy entire plants within days and spreads through wind and rain.
Early blight starts as dark spots with concentric rings on lower, older leaves. It develops in warm, humid conditions and moves up the plant slowly. Affected leaves turn yellow and drop.
Septoria leaf spot creates numerous small spots with dark borders and gray centers on lower leaves. It thrives when leaves stay wet for extended periods.
Prevention requires proper spacing for air circulation and drip irrigation instead of overhead watering. Mulch prevents soil-borne spores from splashing onto leaves. Gardeners should remove diseased leaves immediately and avoid working with plants when wet, as this spreads pathogens.
Copper fungicides work for organic gardens when applied before symptoms appear. Conventional fungicides with different FRAC codes should be rotated to prevent resistance. Applications must cover both upper and lower leaf surfaces.
Protecting Tomatoes from Animals
Deer, rabbits, groundhogs, squirrels, and birds commonly damage tomato plants and fruit. Fencing provides the most reliable protection. A fence needs to be 8 feet tall for deer or buried 12 inches deep with an L-shape bend outward for burrowing animals like groundhogs.
Netting or wire cages around individual plants stop smaller animals. The mesh should be no larger than 1 inch to exclude squirrels and chipmunks. Bird netting draped over plants prevents pecking damage to ripening fruit.
Repellents require frequent reapplication, especially after rain. Motion-activated sprinklers startle animals but must be moved regularly as animals learn their patterns. Harvesting fruit slightly early, when it shows the first blush of color, prevents loss to animals since tomatoes will ripen indoors.
Human scent can deter some animals. Hanging bars of strongly scented soap or spreading human hair around plants may provide temporary relief.
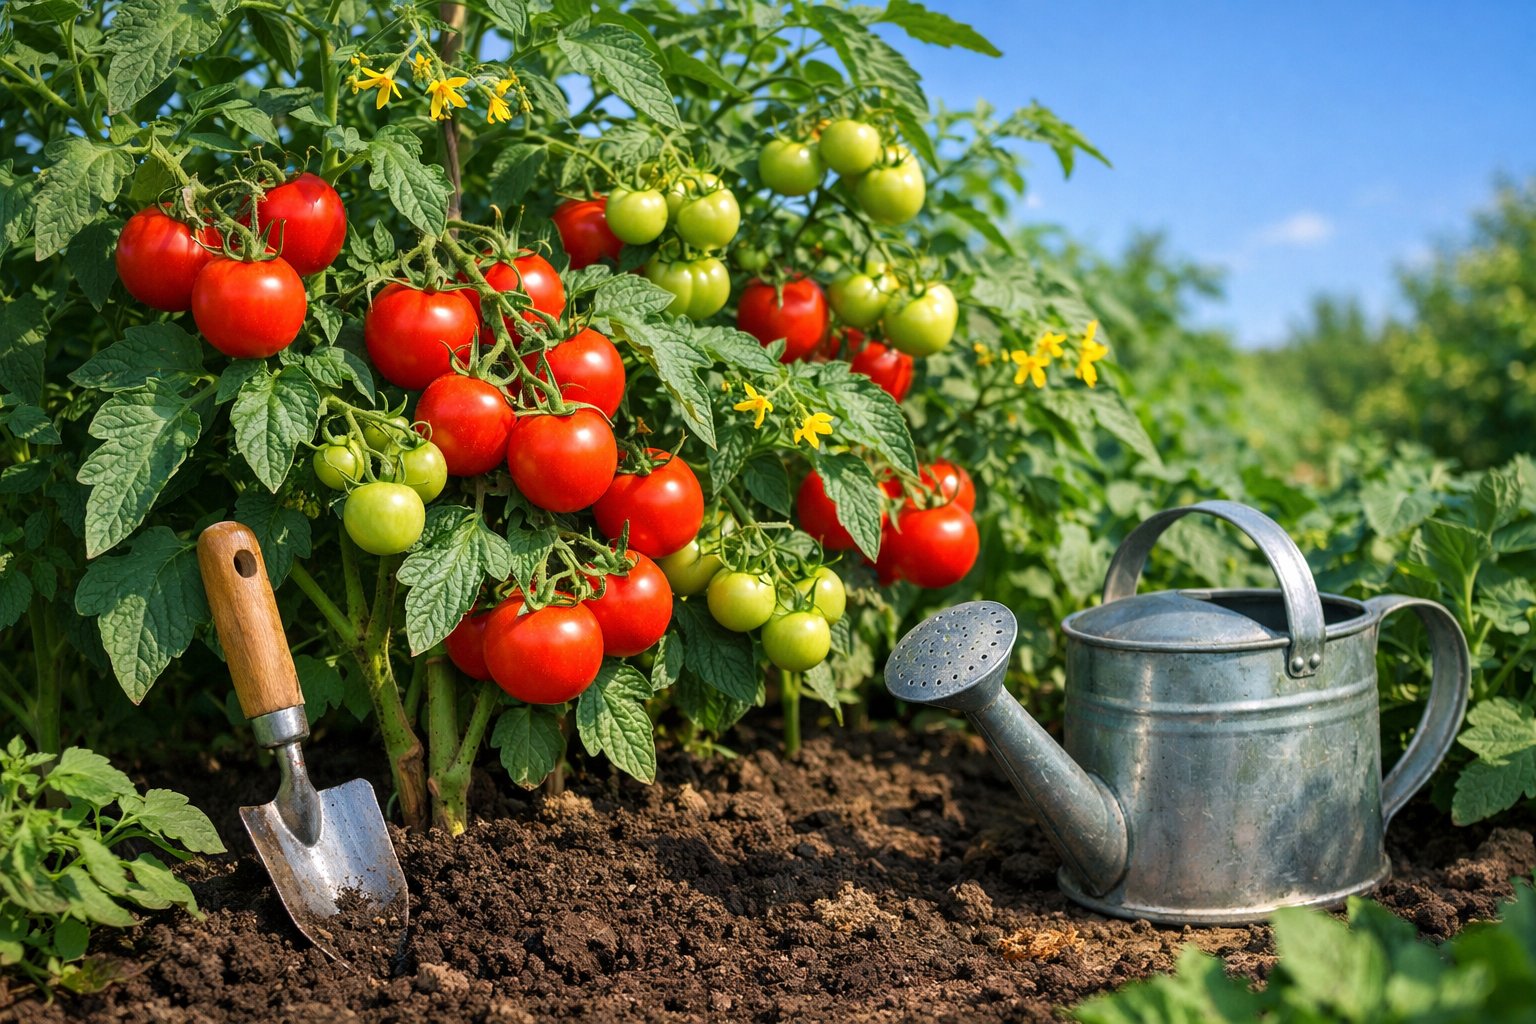
Maximizing Tomato Yield and Flavor
Getting the most fruit from tomato plants and developing rich flavor requires targeted care during the growing season. Strategic pruning directs energy to fruit production, proper fertilization builds both yield and taste, and specific growing conditions unlock the natural sugars that make tomatoes delicious.
Pruning and Training Techniques
Removing suckers from indeterminate tomato varieties increases yields by redirecting energy from excess foliage to fruit development. Suckers are shoots that grow between the main stem and leaf branches. Gardeners should pinch these off when they reach 2-4 inches long.
Lower leaves near the ground should be removed to prevent soil-borne diseases from splashing onto the plant. This also improves air circulation around the base of the plant.
Key pruning practices include:
- Removing suckers below the first flower cluster on all varieties
- Pinching off suckers weekly on indeterminate types
- Cutting off the plant top late in the season to ripen existing fruit
- Keeping pruning minimal on determinate varieties
The Florida weave method supports plants effectively while creating gentle curves in the vine that encourage more fruit production. This technique uses stakes and twine woven between plants every 6-8 inches as they grow.
Fertilizing for Fruit Quality
Tomatoes need different nutrients at different growth stages. Early in the season, nitrogen supports leaf and stem development. Before flowering begins, the focus should shift to phosphorus and potassium.
Too much nitrogen during fruiting causes excessive green growth with few tomatoes. An excess of phosphorus stunts the plant, while too much potassium makes the fruit taste acidic.
Essential nutrients for tomatoes:
- Nitrogen - leafy growth (early season)
- Phosphorus - root development and flowering
- Potassium - fruit production and quality
- Calcium - prevents blossom end rot
- Magnesium and iron - chlorophyll production
Plants should be fertilized at planting time and then every 2-3 weeks throughout the growing season. Switching to a potassium-rich fertilizer before flowering improves both yield and flavor.
Flavor Development: Sugar, Sunlight, and Care
Tomato flavor comes from the balance of sugars and acids that develop inside the fruit. More sunlight means more sugar production through photosynthesis. Plants need at least 6-8 hours of direct sun daily for optimal flavor.
Consistent watering affects taste significantly. Irregular watering creates stress that can make tomatoes taste bland or develop poor texture. The soil should stay evenly moist but never waterlogged.
Allowing tomatoes to fully ripen on the vine produces the best flavor. The plant continues sending sugars and other compounds to the fruit until it's picked. Tomatoes harvested early and ripened off the vine never develop the same depth of taste.
Some varieties naturally produce more sugar than others. Cherry and grape tomatoes typically have higher sugar content than large beefsteak types. Choosing flavorful varieties like Sungold, Black Krim, or Brandywine gives gardeners a head start on taste.
Temperature also plays a role in flavor. Tomatoes develop the best taste when daytime temperatures stay between 70-85°F. Extreme heat above 95°F can prevent proper sugar development and create bland food.
Tomato Companion Planting and Crop Rotation
Growing certain plants near tomatoes can improve pest control and increase yields, while moving tomatoes to different garden spots each year helps prevent disease buildup in the soil.
Best Tomato Companion Plants
Basil stands out as one of the most beneficial companions for tomatoes. It repels whiteflies, thrips, and hornworms while potentially boosting tomato yields.
Beans and peas help fix nitrogen in the soil, enriching it for tomatoes. Research shows that growing peas with tomatoes can increase yields by 20 percent.
Marigolds protect tomatoes from root knot nematodes. French marigolds work particularly well when planted around the base of tomato plants.
Garlic, onions, and garlic chives deter pests with their strong scents. These alliums also help protect against diseases like Verticillium wilt through their sulfur compounds.
Carrots and beets make efficient use of garden space. They grow below ground while tomatoes grow upward, allowing both crops to thrive together.
Herbs like oregano, parsley, and cilantro attract beneficial insects that prey on tomato pests. Oregano's volatile oils specifically repel whiteflies.
Flowers such as calendula, cosmos, and borage bring pollinators and predatory insects to the garden. Borage attracts beneficial bugs that keep harmful pests in check.
Rotating Tomatoes to Reduce Soil-Borne Problems
Tomatoes should not be planted in the same location two years in a row. Moving them to a different garden spot prevents soil-borne diseases and nutrient depletion.
Wait at least three to four years before planting tomatoes in the same bed again. This break helps eliminate disease pathogens that build up in the soil.
Avoid planting tomatoes where peppers, eggplants, or potatoes grew the previous year. These crops belong to the same nightshade family and share many diseases.
Plant cover crops like hairy vetch in beds during the off-season. Hairy vetch fixes nitrogen and can be used as green mulch when cut down before planting tomatoes.
Follow tomatoes with cool-season crops like beets or carrots. This approach maximizes garden productivity while giving the soil a break from nightshade plants.
Harvesting and Preserving Tomatoes
Knowing when to pick tomatoes and how to store them properly extends the harvest season for months. The right harvesting techniques protect flavor, while preservation methods like canning and freezing keep homegrown tomatoes available year-round.
When and How to Harvest for Peak Flavor
Tomatoes reach peak flavor when they ripen fully on the vine. The fruit should feel slightly soft when gently squeezed and show full color for the variety being grown.
Gardeners should harvest in the morning after dew dries but before the afternoon heat. A gentle twist and pull removes the fruit from the stem without damaging the plants. Using clean garden shears works well for varieties with tough stems.
When temperatures drop below 50°F at night, growers should pick all fruit that has reached full size. Green tomatoes continue to ripen indoors because tomatoes are climacteric fruits that produce ethylene gas. Placing them in a cardboard box or paper bag at room temperature speeds up ripening. Adding a ripe banana or apple increases ethylene levels and makes the process faster.
Tomatoes should never go in the refrigerator if eating them fresh. Cold temperatures below 50°F damage the cell structure and reduce flavor.
Techniques for Canning and Storing Tomatoes
Freezing offers the simplest preservation method for tomatoes. Whole tomatoes can be spread on a baking sheet, frozen for 24 to 48 hours, then transferred to freezer bags. Many gardeners prefer blanching tomatoes in boiling water for 30 seconds, peeling them, then freezing in jars or bags.
Canning tomatoes using the boiling water bath method requires adding lemon juice or citric acid to ensure safe acidity levels. Two tablespoons of lemon juice per quart jar prevents bacterial growth. The jars must be processed in boiling water for 45 minutes for pints and 85 minutes for quarts.
Dehydrating creates concentrated tomato flavor. Sliced tomatoes dried at 135°F for 8 to 12 hours become shelf-stable and work well in soups and sauces. Properly dried tomatoes feel leathery but not brittle.
All preservation methods work best with unblemished fruit. Damaged or diseased tomatoes should not be used for long-term food storage.
Troubleshooting Common Tomato Issues
Most tomato problems stem from environmental stress or nutritional imbalances rather than disease. Plants show specific symptoms that point directly to fixable issues with water, light, nutrients, or temperature.
Diagnosing Growth and Fruit Problems
No fruit production typically results from four main causes. Insufficient sunlight prevents flowering in plants that need 6-8 hours of direct sun daily. Excess nitrogen creates lush foliage but no flowers or fruit. Inconsistent watering stresses plants and stops fruit development. Poor pollination occurs when bees are absent or air movement is limited.
Cracking fruit happens when plants receive too much water right before harvest. Large beefsteak and heirloom varieties crack most easily. Growers should harvest bigger fruits slightly early and ripen them indoors with stems facing down.
Blossom end rot appears as black spots on fruit bottoms. The actual cause is calcium unavailability from irregular watering, not calcium-deficient soil. Plants cannot absorb existing soil calcium during moisture extremes.
Yellow leaves signal nitrogen deficiency, overwatering, underwatering, or transplant shock. Wilting with dry soil means underwatering. Wilting with wet soil indicates root rot from overwatering.
Remedies for Environmental Stress
Consistent watering solves most growth problems. Soil should stay as moist as a wrung-out sponge. A 2-3 inch mulch layer maintains even moisture and prevents fluctuations between wet and dry.
For blossom end rot, remove affected fruits and establish regular watering. Future fruits will develop normally once moisture stabilizes.
For excess leaf growth, prune heavily and add carbon-rich mulch like straw to balance nitrogen. Apply phosphorus-rich amendments such as bone meal or compost to shift energy toward fruiting.
For poor fruiting, ensure full sun exposure and reduce nitrogen inputs. Hand-pollinate by gently shaking plants or using an electric toothbrush against flower bases to vibrate pollen loose.
Temperature protection matters during extremes. Plants stop setting fruit above 95°F or below 55°F. Row covers or shade cloth help moderate conditions for continued production.
The Tomato's Impact: Culture, Art, and Humanity
The tomato transformed from a marginalized crop into a central element of global cuisine and culture. This fruit has influenced artistic expression, driven technological advancement, and contributed to human health in ways that extend beyond simple nutrition.
The Tomato in Global Food and Art
The tomato appears in still life paintings across Europe, particularly in Dutch and Italian art from the 17th century onward. Artists used tomatoes to represent abundance and the exotic origins of New World crops. The bright red color made it a popular subject for painters exploring light and texture.
Cuisine evolved dramatically as the tomato spread across continents. Italian food culture changed completely when cooks began incorporating tomatoes into sauces and dishes in the 18th century. What people now consider traditional Italian recipes were actually recent innovations in culinary history.
Cultural impact includes:
- Transformation of Mediterranean cooking traditions
- Central role in Italian, Spanish, and Mexican cuisines
- Symbol of summer and fresh produce in literature
- Subject matter in paintings depicting markets and harvests
The hands behind these culinary transformations often remain unnamed, but their collective effort shaped how entire societies eat today.
Historical Innovations: Wheel, Drums, and Trade
The tomato's global spread required major technological systems. Railroads enabled long-distance transport of fresh tomatoes to urban markets in the 1800s. Metal drums and early canning equipment allowed preservation of tomatoes for year-round consumption.
The wheel played an essential role in tomato agriculture through wheeled plows and carts that moved harvests from fields to processing facilities. Trade networks expanded as demand grew, creating economic opportunities across multiple continents.
These transportation and preservation technologies changed how people accessed food. Communities no longer relied solely on local seasonal produce.
Tomatoes and Health: From Organ Function to Nutrition
Tomatoes contain lycopene, a compound that supports heart health and may reduce risks of certain organ diseases. Research shows lycopene benefits prostate health and supports healthy skin function. The human body absorbs lycopene better from cooked tomatoes than raw ones.
Key nutrients in tomatoes:
- Vitamin C for immune function
- Potassium for heart and kidney health
- Vitamin K for bone health
- Folate for cell function
A medium tomato provides about 25% of daily vitamin C needs while containing only 22 calories. The fiber content supports digestive system health and helps maintain stable blood sugar levels. These nutritional benefits explain why tomatoes became valued beyond their culinary uses in cultures worldwide.
Frequently Asked Questions
Growing tomatoes successfully depends on understanding temperature requirements, proper spacing, variety selection, basic care practices, planting timing, and pruning methods. These factors work together to produce healthy plants and abundant harvests across different growing zones.
What are the optimal conditions for growing tomatoes in zones 3 through 10?
Tomatoes need at least 6 to 8 hours of direct sunlight each day to grow well and produce fruit. The plants prefer temperatures between 70 and 85 degrees Fahrenheit during the day. Night temperatures should stay above 55 degrees for proper fruit development.
Soil quality matters just as much as temperature and light. Well-draining soil with lots of organic matter gives tomatoes the best chance to thrive. The soil pH should fall between 6.0 and 7.0, which is slightly acidic to neutral.
Water needs stay consistent throughout the growing season. Plants require 1 to 1.5 inches of water per week from rain or irrigation. The soil should stay evenly moist but never waterlogged.
Northern zones face shorter growing seasons with 90 to 120 frost-free days. Southern zones can have more than 250 frost-free days but deal with extreme summer heat instead.
How should tomatoes be spaced when planting in rows for maximum yield?
Determinate tomato varieties need 18 to 24 inches of space between each plant. These compact plants grow to a set height and produce most of their fruit at once. The rows themselves should be 3 to 4 feet apart.
Indeterminate varieties require more room at 24 to 36 inches between plants. These varieties keep growing taller throughout the season and produce fruit continuously. Proper spacing allows air to move freely between plants, which reduces disease problems.
Gardeners growing tomatoes in containers should choose pots that are at least 5 gallons in size. A single plant needs this much space for its root system to develop properly.
What are the best tomato varieties to grow in cooler climates such as Zone 3?
Early-maturing varieties work best in Zone 3 because they produce ripe fruit before the first fall frost arrives. 'Early Girl' produces medium-sized red tomatoes in 50 to 55 days. 'Stupice' is a cold-tolerant Czech heirloom that ripens in about 52 days.
'Glacier' handles cool temperatures better than most varieties and matures in 55 days. 'Sub Arctic Plenty' was bred specifically for short growing seasons and ripens in 45 to 50 days. Cherry tomato varieties like 'Sun Gold' and 'Sweet Million' also perform well in northern zones.
Starting seeds indoors 6 to 8 weeks before the last frost date gives plants a head start. Gardeners can also use season-extending tools like row covers and cold frames to protect plants from late spring and early fall frosts.
What specific care instructions should beginners follow for successful tomato cultivation?
New gardeners should water tomato plants deeply and regularly to maintain consistent soil moisture. Irregular watering leads to problems like blossom end rot and cracked fruit. Applying 2 to 3 inches of organic mulch around plants helps the soil retain moisture and prevents weeds.
Fertilizing starts at planting time with a balanced fertilizer that contains equal amounts of nitrogen, phosphorus, and potassium. Plants need additional feeding every 2 to 3 weeks during the growing season. Switching to a low-nitrogen fertilizer after the first fruit sets encourages more production.
Support structures must be installed early in the season. Stakes, cages, or trellises keep plants upright and fruit off the ground. This support reduces disease risks and makes harvesting easier.
Watching for common pests and diseases helps catch problems early. Aphids, whiteflies, and hornworms attack tomato plants regularly. Removing affected leaves and using insecticidal soap controls most pest issues.
When is the ideal time to plant tomatoes outdoors in various climate zones?
Tomatoes go into the ground after all danger of frost has passed and soil temperatures reach at least 60 degrees Fahrenheit. Zone 3 gardeners typically plant in late May or early June. Zones 4 and 5 can plant from mid-May through early June.
Gardeners in Zones 6 and 7 usually plant in mid-April to early May. Zones 8 and 9 have longer windows from March through April. Zone 10 allows for nearly year-round planting, though fall planting often works better than summer.
Cold soil slows plant growth and increases disease susceptibility. Waiting an extra week for warmer conditions produces better results than planting too early. Using black plastic mulch warms the soil faster in cooler zones.
What are the essential pruning techniques needed for healthy tomato plants?
Indeterminate tomatoes benefit most from regular pruning throughout the season. Suckers are small shoots that grow between the main stem and branches. Removing these suckers when they are 2 to 4 inches long directs energy toward fruit production.
Gardeners should pinch off suckers by hand or use clean pruning shears. The bottom leaves that touch the soil should also be removed to prevent soil-borne diseases from splashing onto the plant. Taking off these lower leaves improves air circulation around the base.
Determinate varieties need minimal pruning since they naturally grow in a compact bush shape. Removing only damaged or diseased leaves keeps these plants healthy. Over-pruning determinate types reduces their overall fruit production.