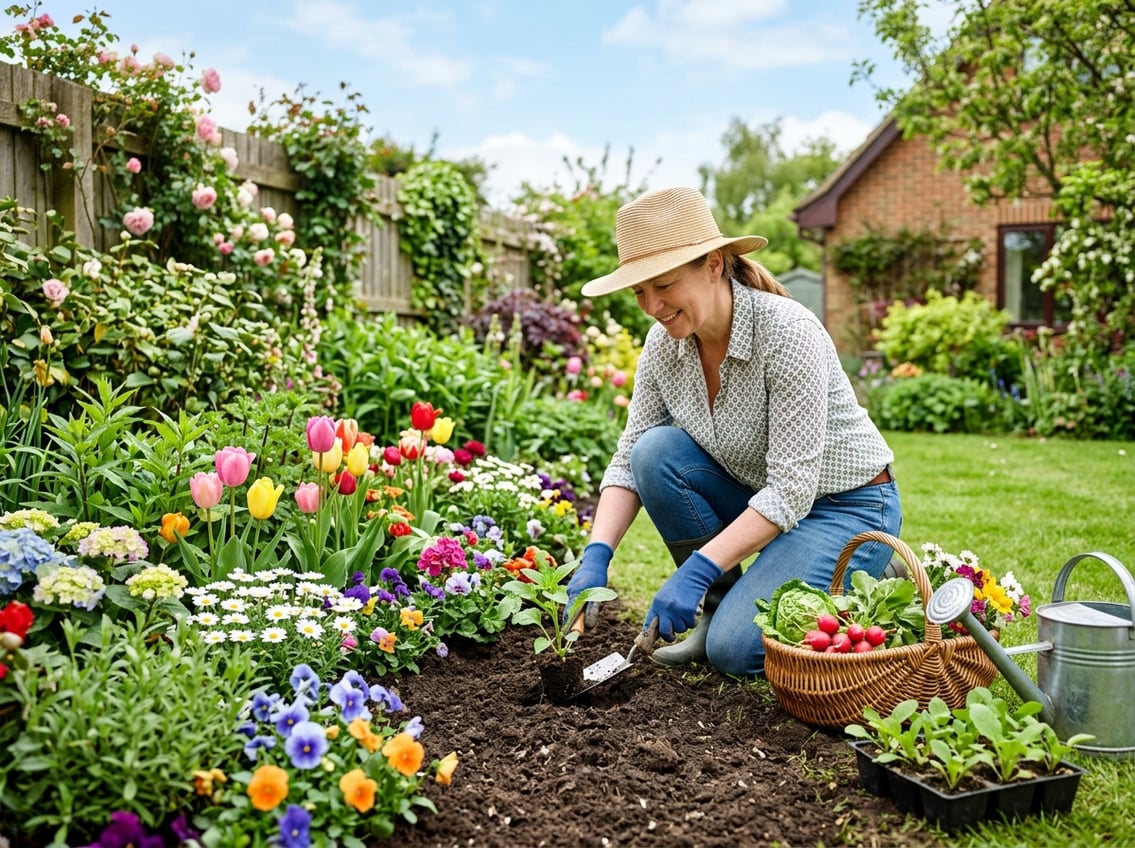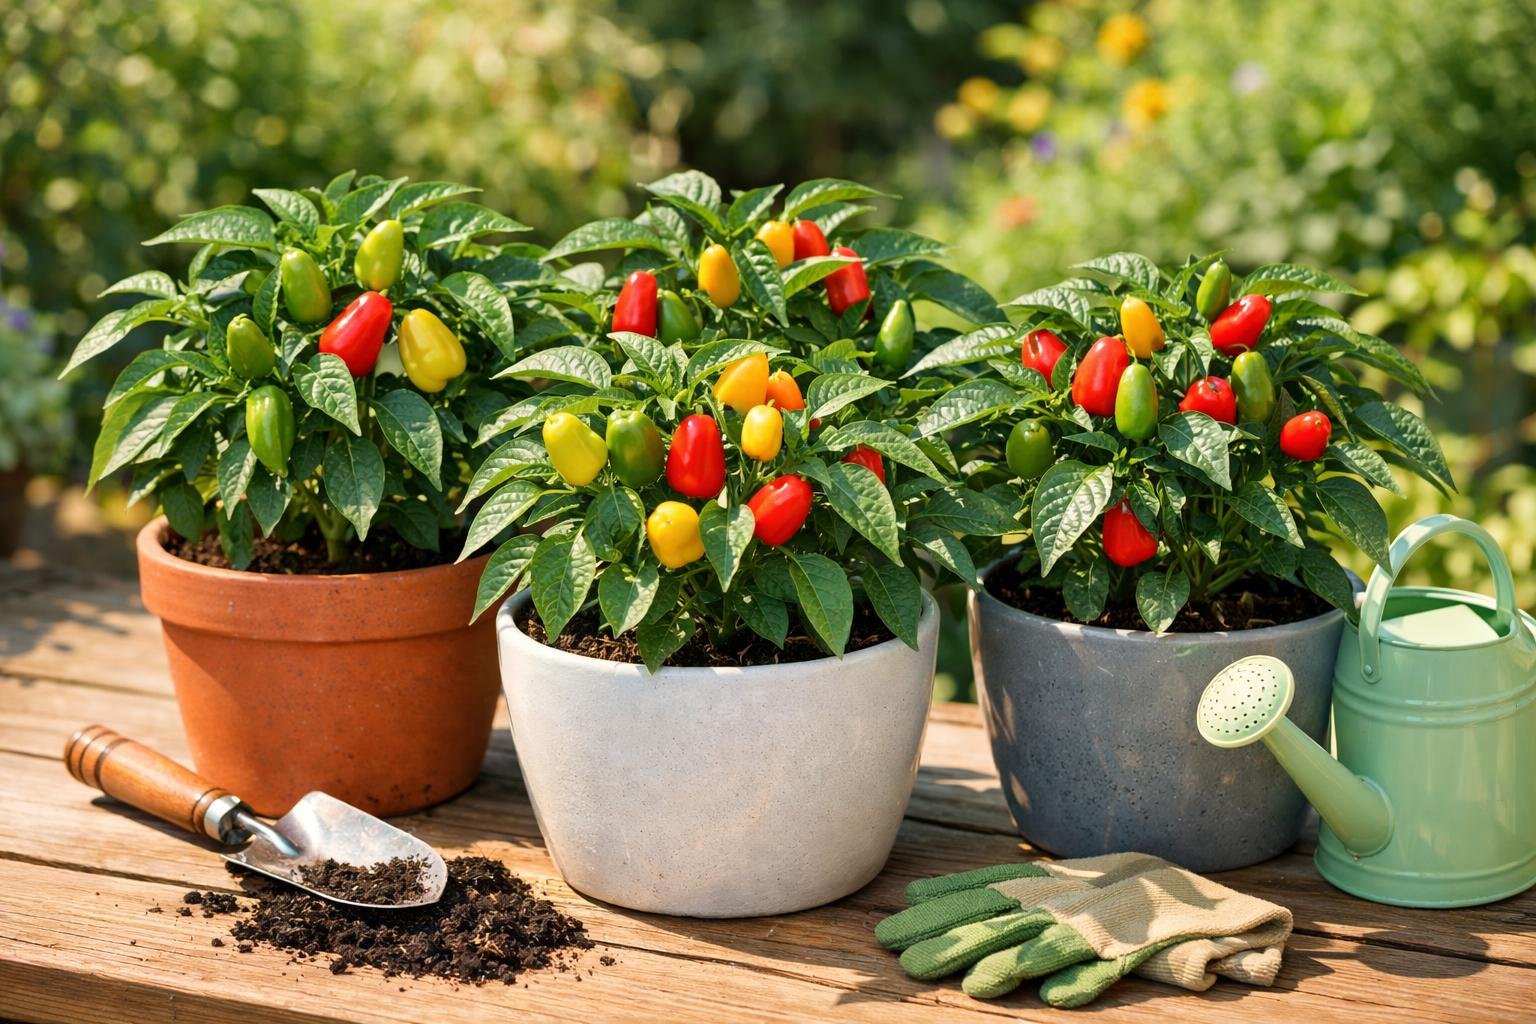
Growing peppers in containers opens up gardening possibilities for anyone with limited space, whether they have a small balcony, patio, or sunny porch. Container-grown peppers can produce just as well as garden-grown plants when given proper pot size, soil, and care. This method gives gardeners control over soil quality, makes watering easier to manage, and allows plants to be moved to follow the sun or avoid harsh weather.
The process starts with selecting the right container size and pepper variety, then moves through planting, daily care, and harvest. Most pepper varieties adapt well to container life, from sweet bells to hot jalapeños. Success comes down to a few basic requirements: enough soil volume for root growth, consistent watering, good drainage, and adequate sunlight.
This guide covers everything needed to grow healthy, productive pepper plants in pots. From choosing containers and preparing soil to managing pests and harvesting peppers at peak ripeness, these steps help both new and experienced gardeners get strong yields from their container pepper plants.
Key Takeaways
- Use containers that hold at least 3-5 gallons of soil to give pepper roots enough room to grow
- Start seeds indoors 6-8 weeks before the last frost date and move plants outside only after temperatures stay above 55°F at night
- Water container peppers regularly to keep soil moist but not soaked, and fertilize every 1-2 weeks during the growing season
Choosing the Right Pepper Varieties for Containers
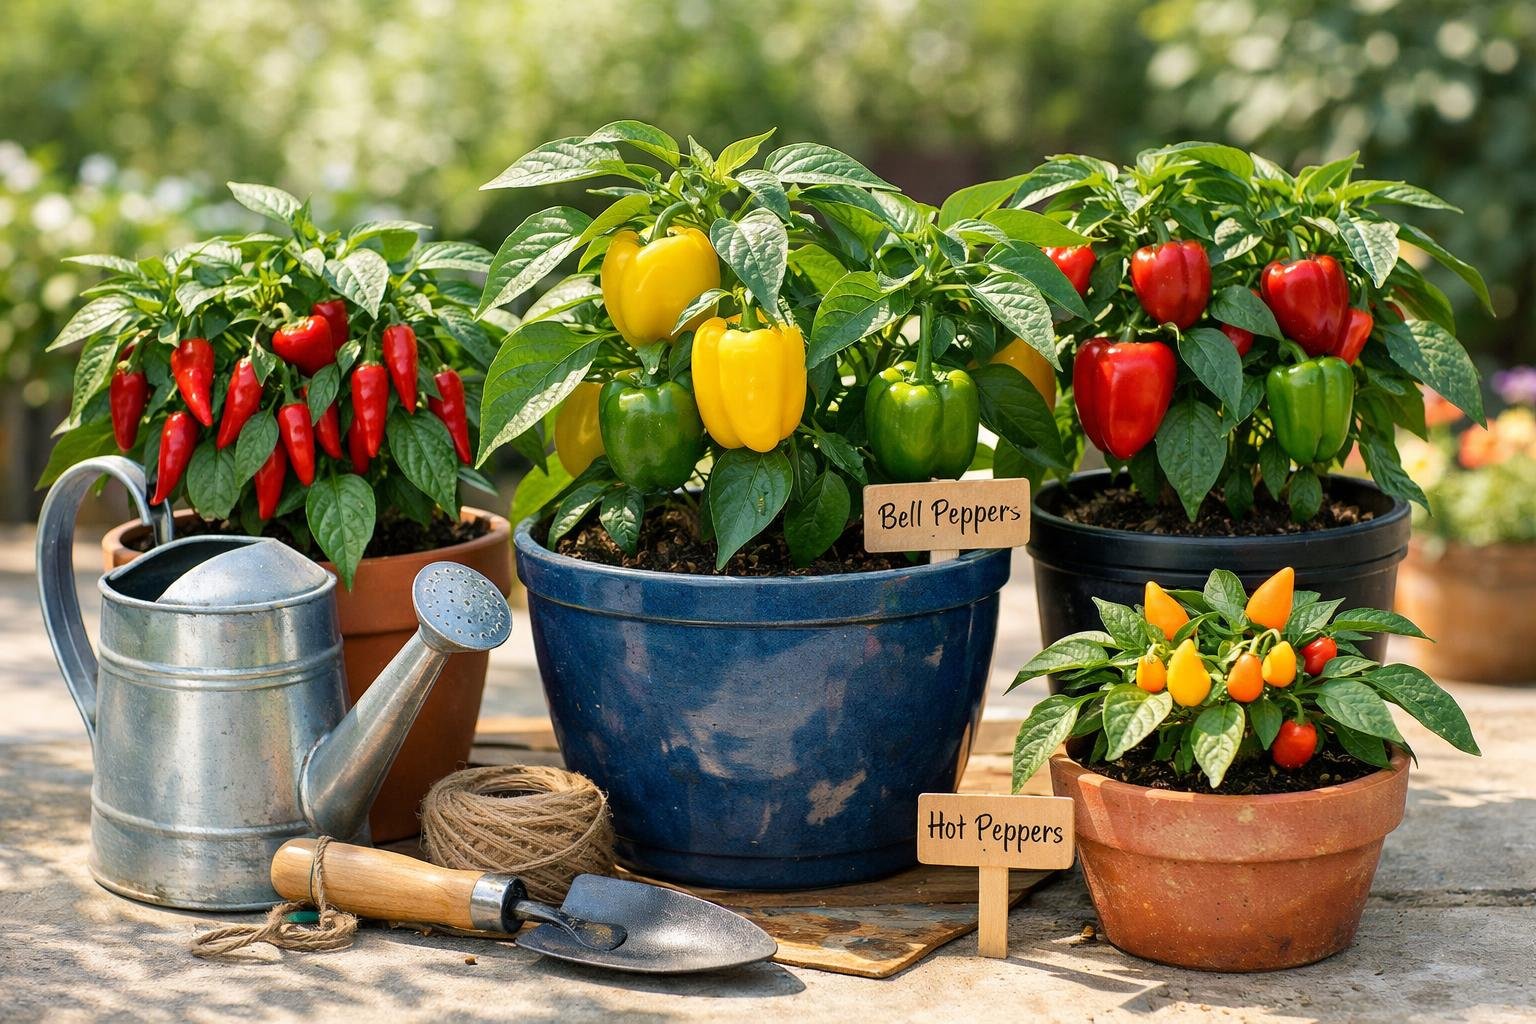
Not all pepper varieties work equally well in containers, but many thrive when given the right pot size and care. The key is matching plant size to container space and choosing varieties that naturally stay compact while still producing good yields.
Compact and Container-Friendly Pepper Types
Container-grown peppers need varieties that won't outgrow their space. Plants under 24 inches tall work best for most pots and small spaces. Mini peppers, Thai chilies, and ornamental types manage well in 3-gallon containers.
Naturally compact varieties include:
- Cherry peppers (both sweet and hot types)
- Bird's eye chili peppers
- Fushimi peppers (24 inches tall)
- Compact ornamental varieties
Larger pepper types like bell peppers, habaneros, and thick-walled varieties need more room. These plants require 5 to 10-gallon containers to produce full yields. Bell pepper plants can grow heavy with fruit and may need staking or tomato cages for support.
Sweet and Hot Pepper Varieties
Sweet pepper varieties that perform well in containers include bell peppers, banana peppers, and Anaheim peppers. Bell peppers produce baseball-sized fruits in orange, red, or purple and take about 75 days to mature. Banana peppers grow faster at 60 days and change from yellow to red-orange as they ripen.
Hot pepper varieties offer more heat in small spaces. Jalapeños grow tall rather than wide and produce heavy yields in 60-75 days when green. Serrano peppers deliver more heat than jalapeños and mature in just 60 days. Habanero peppers take 90 days but pack significant spice at 350,000 Scoville units.
Carolina Reaper plants can grow 5 feet tall but still work in large containers. These extremely hot peppers reach over 1.5 million Scoville units and need 120 days to mature.
Selecting Seeds or Nursery Plants
Seeds cost less and offer more variety choices, but they add 6-8 weeks to the growing timeline. Starting from seed works best for gardeners with longer growing seasons or indoor growing setups.
Nursery plants provide a head start and work better for short growing seasons. When buying plants, look for dark green leaves, sturdy stems, and no signs of pests or disease. Avoid plants with yellowing leaves or roots growing through drainage holes.
Seeds labeled specifically for container growing often indicate compact growth habits. Check the mature plant height on seed packets before buying to ensure the variety fits the available space.
Selecting and Preparing Containers
The right container makes a significant difference in pepper plant health and productivity. Container size, material choice, and drainage capabilities directly impact root development and overall harvest success.
Optimal Container Size and Depth
Bell peppers and larger pepper varieties need containers that hold 5 to 10 gallons of soil for best results. A single plant can survive in a 12-inch pot, but growth will be limited compared to larger containers.
Smaller hot pepper varieties perform well in 3 to 5-gallon containers. The container depth matters just as much as width, with a minimum depth of 12 inches required for healthy root systems.
Shallow pots restrict root growth and cause plants to dry out quickly. Peppers in pots with adequate depth develop stronger root systems that support better fruit production. Wider containers also provide more stability as plants grow taller and become top-heavy with fruit.
Types and Materials of Pots
Terra-cotta pots offer excellent breathability and help prevent overwatering, though they dry out faster than other materials. Plastic planters retain moisture longer and weigh less, making them easier to move around patios or balconies.
Fabric grow bags provide superior drainage and air circulation to roots, promoting healthier root development. These bags work best outdoors since they can leak water during watering.
Each material has specific advantages for container gardening:
- Terra-cotta: Natural temperature regulation, heavy and stable
- Plastic: Lightweight, moisture retention, affordable
- Fabric: Root pruning benefits, prevents root binding, collapsible storage
Avoid containers made from treated wood or materials that leach chemicals into the soil.
Ensuring Proper Drainage
Drainage holes are essential for growing bell peppers in pots successfully. Without proper drainage, water accumulates at the bottom and causes root rot.
Each container needs multiple drainage holes at the base, not just one central hole. Drill additional holes if the pot lacks sufficient drainage points. Place a small piece of screen or coffee filter over holes to prevent soil from washing out while still allowing water to escape.
Elevate containers slightly using pot feet or small blocks to ensure water flows freely from the drainage holes. This prevents potted pepper plants from sitting in water-filled saucers for extended periods.
Potting Mix and Soil Preparation
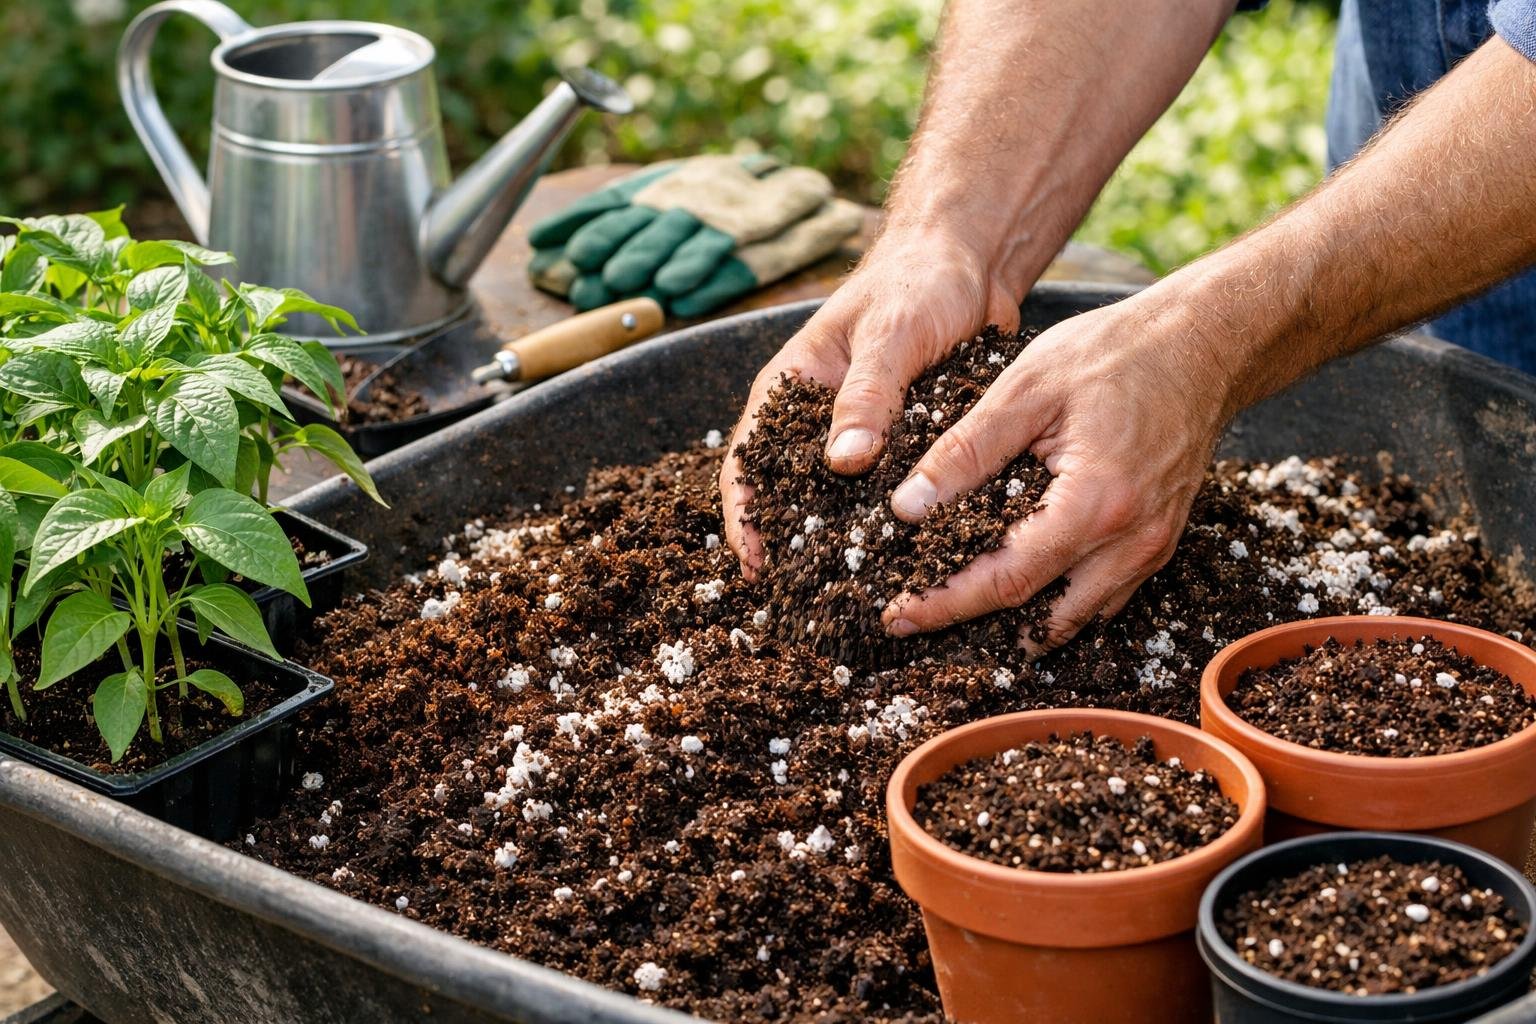
The right soil mix gives pepper plants the nutrients and drainage they need to produce healthy fruit. Garden soil compacts in containers and blocks oxygen from reaching roots, so peppers need a specially prepared potting mix instead.
Best Soil Mixes for Peppers
Peppers grow best in a light, fluffy potting mix designed for vegetables. A quality commercial mix contains ingredients like peat moss or coco coir for moisture retention, along with perlite or vermiculite for drainage. These mixes provide the loose texture pepper roots need to spread and access nutrients.
Gardeners can make their own blend using equal parts compost, coco coir, perlite, and worm castings. For a 5-gallon container, this means combining roughly 3 gallons of compost with equal amounts of the other ingredients. The compost supplies nutrients, while coco coir holds moisture without becoming waterlogged. Perlite creates air pockets in the soil, and worm castings add beneficial microbes.
Adding slow-release granular fertilizer to the potting mix at planting time provides steady nutrition throughout the growing season. A shovelful of well-rotted manure enriches the soil further. Peppers are moderate feeders, so they benefit from nutrient-rich soil without requiring excessive fertilization later.
Improving Drainage and Aeration
Proper drainage prevents root rot, which kills pepper plants quickly. Every container needs at least three drainage holes that measure half an inch across. Fabric grow bags provide excellent drainage naturally because water seeps through the porous material. Plastic pots require more holes drilled into the bottom.
Mixing perlite or coarse sand into potting soil improves drainage significantly. These materials create spaces between soil particles where water flows through instead of pooling. A ratio of one part perlite to three parts potting mix works well for most pepper varieties. Hot peppers like habaneros need even faster drainage and benefit from extra perlite.
The soil should feel moist but never soggy when squeezed. Gardeners can test drainage by watering thoroughly and checking if water flows from the bottom holes within a few seconds. Standing water indicates poor drainage that needs correction before planting.
Planting and Transplanting Peppers
Starting peppers from seed indoors gives gardeners a head start on the growing season, while proper transplanting techniques ensure healthy plants that produce abundant fruit. The timing and method of moving seedlings into their final containers can make the difference between struggling plants and thriving ones.
Starting Seeds Indoors
Pepper seeds need warm soil to germinate properly. Gardeners should start seeds 8-10 weeks before the last expected frost date in their area.
Plant seeds about 1/4 inch deep in small containers or seed trays filled with seed-starting mix. The soil temperature should stay between 75-85°F for best results. A seedling heat mat helps maintain consistent warmth.
Seeds typically sprout within 7-14 days. Once seedlings emerge, they need 12-16 hours of light daily. A grow light positioned 2-3 inches above the plants works well for indoor growing.
Keep the soil moist but not waterlogged. Seedlings are ready for transplanting when they have 2-4 true leaves and stand 3-4 inches tall.
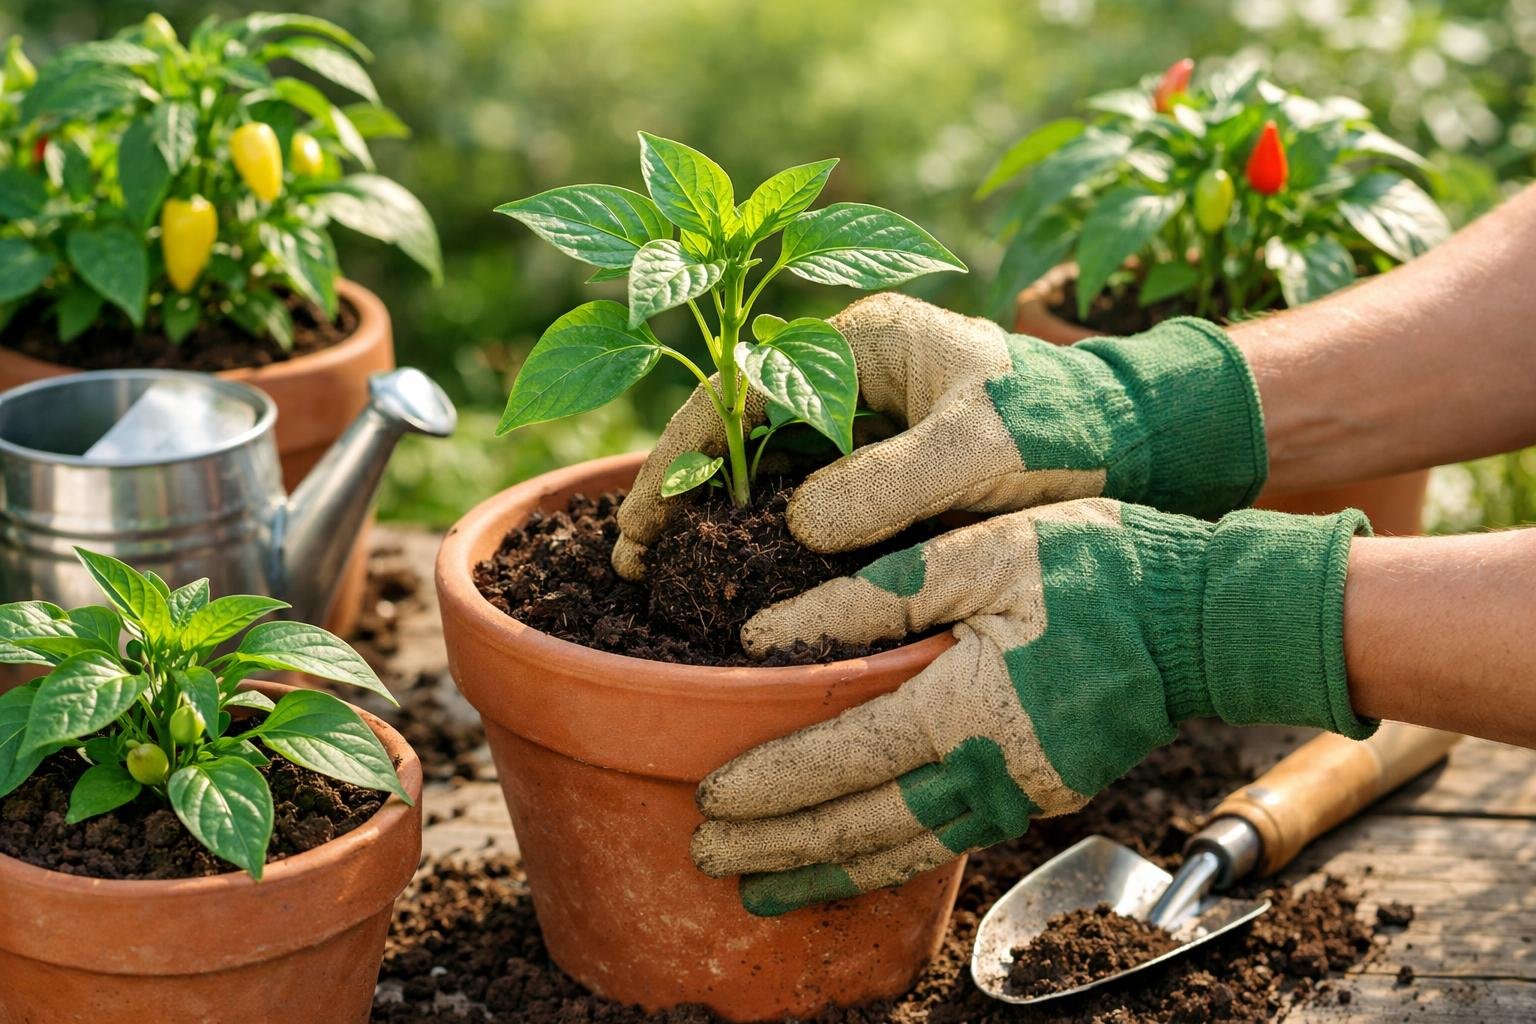
Transplanting Seedlings to Containers
Peppers must be hardened off before moving outdoors permanently. Place seedlings outside in a protected spot for 1-2 hours on the first day, gradually increasing outdoor time over 7-10 days.
Wait until nighttime temperatures consistently stay above 55°F before transplanting. Cold temperatures can stunt growth or kill young pepper plants.
Choose containers at least 12-18 inches deep with drainage holes. Bell peppers in pots need adequate room for root development. Fill containers with high-quality potting soil mixed with compost.
Gently remove seedlings from their starter pots and plant them at the same depth they were growing. Water thoroughly after planting to settle the soil around roots.
Spacing and Planting Depth
Each pepper plant needs its own container to grow properly. A single plant requires a pot that holds at least 5 gallons of soil.
Plant the seedling so the soil line matches where it was in the starter container. Planting too deep can lead to stem rot, while planting too shallow leaves roots exposed.
If growing multiple containers, space them 18-24 inches apart. This spacing allows air to circulate between plants and gives gardeners room to access each container for watering and harvesting.
Care and Maintenance of Container Peppers
Container peppers need consistent watering, regular feeding with balanced fertilizers, physical support as they grow taller, and occasional pruning to stay healthy and productive. Proper mulching helps retain moisture and regulate soil temperature throughout the growing season.
Watering Strategies
Container-grown peppers dry out faster than garden plants because of limited soil volume. Gardeners should check soil moisture daily by inserting a finger about an inch deep into the soil. If it feels dry at that depth, the plant needs water.
Most pepper plants in containers require watering every 1-2 days during hot weather. In cooler conditions, watering every 2-3 days may be enough. The key is to water deeply until water runs out the drainage holes, which encourages strong root growth.
Early morning watering works best because it gives plants time to absorb moisture before heat peaks. Drip irrigation systems or soaker hoses deliver water directly to the roots and reduce waste. Self-watering containers can help maintain consistent moisture levels for gardeners who travel or have busy schedules.
Avoid getting water on the leaves, as wet foliage can lead to disease problems. Always ensure containers have adequate drainage holes to prevent waterlogged soil, which causes root rot.
Fertilization and Nutrient Management
Peppers are heavy feeders that need regular nutrition throughout the growing season. A balanced fertilizer with equal parts nitrogen, phosphorus, and potassium (like 10-10-10) supports both foliage growth and fruit production.
Slow-release fertilizer applied at planting time provides steady nutrition for 2-3 months. Gardeners should mix granules into the potting soil according to package directions before transplanting seedlings. This method reduces the risk of over-fertilizing and eliminates frequent feeding schedules.
Water-soluble fertilizers offer another option for container gardening. These liquid feeds should be applied every 2-3 weeks during active growth. Fish emulsion and compost tea provide organic alternatives that release nutrients gradually.
When flowers appear, switch to a fertilizer higher in phosphorus and potassium to encourage fruit development. Look for formulas labeled for tomatoes or vegetables. Yellow leaves often signal nitrogen deficiency, while poor fruit set may indicate a lack of phosphorus.
Staking and Supporting Plants
Pepper plants in containers need support once they reach 12-18 inches tall. The weight of developing fruit can cause stems to bend or break without proper staking.
Simple bamboo stakes or metal tomato cages work well for most pepper varieties. Push stakes 2-3 inches deep into the soil near the plant's base, being careful not to damage roots. Tie the main stem loosely to the stake using soft garden twine or cloth strips.
Larger pepper varieties like bell peppers benefit from tomato cages that provide support on all sides. Place cages around plants when they're young so stems can grow through the openings naturally. This prevents damage from forcing mature plants through cage openings later.
Check ties regularly and adjust them as plants grow. Ties that are too tight can cut into stems and restrict growth. Supporting plants also improves air circulation around leaves and fruit, which helps prevent disease.
Pruning and Mulching
Light pruning helps pepper plants focus energy on fruit production. Remove the first few flowers that appear to encourage stronger root and stem development. Pinch off any branches growing below the first Y-shaped split in the main stem.
Cut away yellow or diseased leaves as soon as they appear. This prevents problems from spreading to healthy parts of the plant. Use clean, sharp scissors or pruning shears to make cuts just above a leaf node.
Mulch keeps soil temperatures stable and reduces water evaporation in containers. Apply a 1-2 inch layer of organic mulch like straw, shredded bark, or compost on the soil surface. Keep mulch an inch away from the plant stem to prevent moisture-related diseases.
Refresh mulch as it breaks down throughout the season. Organic mulches decompose over time and add nutrients back to the soil. This improves soil structure and supports beneficial microorganisms that help pepper plants thrive in container environments.
Maximizing Growth and Productivity
Getting the most out of container peppers requires attention to three key factors: providing enough sunlight for photosynthesis, maintaining stable temperatures while protecting plants from harsh weather, and ensuring proper pollination for fruit development.
Ensuring Adequate Sunlight
Peppers need 6-8 hours of direct sunlight daily to produce healthy fruit. When growing peppers in pots outdoors, gardeners should place containers in the sunniest spot available, typically a south-facing location.
For growing peppers indoors, natural sunlight through windows often falls short. Supplemental lighting becomes necessary. LED grow lights work best because they produce minimal heat and provide the blue and red light spectrum that peppers need. These lights should be positioned 12-18 inches above the plant canopy.
Container peppers have an advantage over in-ground plants because they can be moved. Gardeners can rotate pots throughout the day to follow the sun or relocate them as seasons change and shade patterns shift. This mobility helps plants receive consistent light exposure.
Plants that don't get enough light will show signs like leggy growth, pale leaves, and poor fruit production. Moving containers to brighter locations or adding grow lights can quickly reverse these problems.
Regulating Temperature and Protection from Elements
Peppers thrive in temperatures between 70-85°F during the day and above 55°F at night. Container peppers face more temperature fluctuations than garden-planted peppers because their roots have less soil insulation.
During hot weather, containers heat up quickly and can stress plants. Placing pots in locations with afternoon shade helps prevent overheating. Light-colored containers reflect heat better than dark ones. Mulching the soil surface keeps roots cooler and retains moisture.
Cold protection matters for extending the growing season. When temperatures drop below 55°F, gardeners should move containers indoors or to a protected area. Frost will damage or kill pepper plants, so bringing them inside during cold snaps keeps them productive longer.
Wind can dry out container soil rapidly and damage stems. Placing pots near walls or using windbreaks reduces stress on plants. Staking taller varieties prevents them from tipping over in strong winds.
Pollination Tips for Peppers
Peppers are self-pollinating, meaning each flower contains both male and female parts. However, they still need help transferring pollen, especially when growing peppers indoors where natural pollinators can't reach them.
Outdoor container peppers usually get pollinated by wind and insects. Indoor plants need manual pollination for best results. Gardeners can gently shake plants daily to distribute pollen or use a small paintbrush to transfer pollen between flowers.
The best time for pollination is mid-morning when flowers are fully open and pollen is most viable. Humidity levels between 50-70% improve pollination success. Too much humidity causes pollen to clump, while too little dries it out.
Temperature affects pollination significantly. Flowers may drop without setting fruit when nighttime temperatures stay above 75°F or below 55°F. Maintaining proper temperature ranges ensures consistent fruit production throughout the growing season.
Pest, Disease, and Problem Management
Container-grown peppers face fewer pest and disease issues than garden-planted varieties, but they still need regular monitoring. Daily checks help catch problems early when they're easier to fix.
Common Pests and Prevention Methods
Three main pests target potted pepper plants: aphids, spider mites, and whiteflies.
Aphids appear as small green or yellow insects clustered under leaves. They suck plant sap and cause leaves to curl and yellow. A strong spray of water knocks them off plants. Insecticidal soap or neem oil works as a natural treatment. Ladybugs eat aphids and provide long-term control.
Spider mites are tiny red or brown bugs that create thin webs on leaves. They cause stippled, discolored leaves and reduce fruit production. Misting plants regularly increases humidity and discourages them. Neem oil or insecticidal soap controls active infestations.
Whiteflies look like small white moths on leaf undersides. They weaken plants by feeding on sap and leave behind sticky honeydew. Yellow sticky traps catch adult flies. Apply neem oil or insecticidal soap every 5-7 days until the population disappears.
Daily inspection prevents major outbreaks. Check under leaves where pests hide.
Disease Identification and Control
Growing bell peppers in pots reduces soil-borne diseases, but fungal and bacterial problems still occur.
Bacterial leaf spot creates circular brown lesions with yellow halos on leaves. Remove infected leaves immediately and dispose of them in the trash. Copper-based fungicides prevent spread when applied early. Avoid getting leaves wet during watering.
Fungal rot causes brown or black spots on stems and roots. Plants wilt and drop leaves. This happens from overwatering or poor drainage. Let soil dry slightly between waterings. Remove affected plants to stop spread to other containers.
Powdery mildew forms white powder on leaves and stems. It thrives in humid conditions with poor airflow. Space containers apart to improve air circulation. Sulfur-based sprays or neem oil treat active infections.
Water at the base of plants to keep foliage dry. Clean containers between plantings to remove disease spores.
Troubleshooting Growth and Fruit Issues
Problems with growth or fruiting often stem from care issues rather than pests or diseases.
Blossom drop happens when flowers fall off without forming fruit. This occurs when temperatures exceed 90°F or drop below 55°F at night. Move containers to cooler spots during heat waves. Inconsistent watering also causes blossom drop.
Yellowing leaves indicate nitrogen deficiency or overwatering. Check if soil stays too wet. Feed plants with balanced fertilizer if drainage is good. Bottom leaves naturally yellow as plants age.
Stunted growth results from containers that are too small or lack of nutrients. Peppers need at least 5-gallon containers. Feed every two weeks during growing season with liquid fertilizer diluted to half strength.
Leaf curl without pests present suggests irregular watering. Container soil dries faster than garden beds. Check soil moisture daily and water when the top inch feels dry.
Harvesting and Storing Peppers
Knowing when to pick peppers and how to store them properly makes the difference between enjoying fresh produce for weeks or watching it spoil within days. The right harvesting techniques also encourage plants to keep producing more peppers throughout the growing season.
When and How to Harvest
Container peppers reach maturity at different times depending on the variety. Bell peppers typically need 60-90 days from transplanting, while jalapeños mature in 70-85 days and banana peppers in 60-75 days.
Most peppers start green and change color as they ripen. Bell peppers turn red, yellow, or orange when fully mature. Jalapeños can be picked green or left to ripen to red. Banana peppers shift from pale yellow to orange or red.
Gardeners can harvest peppers at any stage once they reach usable size. Green peppers taste more bitter, while fully colored peppers offer sweeter, fuller flavor. The trade-off is that leaving peppers on the plant longer to change color means fewer total peppers produced.
Use clean, sharp scissors or pruning shears to cut peppers from the plant. Leave a short stem attached to the pepper. Pulling or twisting peppers off by hand can damage branches and reduce future yields.
Extending Your Harvest Season
Regular picking signals the plant to produce more flowers and fruits. Check container plants every 3-4 days during peak season and remove all peppers that have reached harvestable size.
Moving containers indoors or to a protected area extends the growing season when temperatures drop. Most pepper plants continue producing as long as nighttime temperatures stay above 55°F. A frost will kill pepper plants, so gardeners should harvest all remaining peppers before the first freeze.
Some growers bring entire containers inside to a sunny window for continued production. Others take cuttings from healthy plants to overwinter indoors and replant the following spring.
Proper Storage After Picking
Fresh peppers last longest when stored unwashed in the refrigerator's crisper drawer. Place them in a plastic bag with small holes for air circulation. Bell peppers stay fresh for 1-2 weeks this way, while thicker-walled jalapeños and banana peppers can last up to 3 weeks.
Room temperature storage works for peppers that will be used within 2-3 days. Keep them in a cool, dry spot away from direct sunlight.
For long-term storage, freezing works well for all pepper types. Wash, dry, and remove seeds and stems before freezing. Dicing peppers before freezing makes them ready to use in cooking. Frozen peppers maintain quality for 6-8 months.
Drying is another preservation method that works particularly well for thin-walled varieties like jalapeños and banana peppers. String peppers together and hang them in a warm, dry location, or use a food dehydrator.
Frequently Asked Questions
Growing peppers in containers raises common questions about seed starting, watering schedules, soil types, pot dimensions, plant support, and pest management. Understanding these essential aspects helps gardeners avoid common mistakes and achieve healthy, productive pepper plants.
What are the steps to successfully grow peppers from seeds in containers?
Starting peppers from seeds requires planning and attention to timing. Seeds should be planted indoors 8-10 weeks before the last expected frost date in the area.
Fill small starter pots or seed trays with a sterile seed-starting mix. Plant seeds about 1/4 inch deep and keep the soil consistently moist but not waterlogged.
Pepper seeds need warm conditions to germinate properly. The soil temperature should stay between 75-85°F for best results. A heat mat placed under seed trays helps maintain consistent warmth.
Once seedlings develop their first true leaves, they can be transplanted into larger containers. Harden off seedlings by gradually exposing them to outdoor conditions over 7-10 days before moving them to their permanent containers.
How often should peppers be watered when grown in pots?
Container-grown peppers need more frequent watering than plants in garden beds. The soil should be checked daily by inserting a finger into the top inch of soil.
Water when the top inch feels dry to the touch. This typically means watering every 1-3 days depending on weather conditions, container size, and plant maturity.
Hot and windy days increase water evaporation, requiring more frequent watering. Larger containers retain moisture longer than smaller ones.
Water deeply until excess drains from the bottom holes. This ensures the entire root system receives moisture and prevents salt buildup in the soil.
What type of soil is ideal for cultivating peppers in containers?
Peppers thrive in well-draining potting mix specifically designed for containers. Regular garden soil is too heavy and compacts in pots, restricting root growth and drainage.
A quality potting mix should contain ingredients like peat moss, coconut coir, perlite, or vermiculite. These materials provide good drainage while retaining adequate moisture.
The soil pH should range between 6.0 and 7.0 for optimal nutrient availability. Peppers prefer slightly acidic to neutral conditions.
Adding compost to the potting mix enriches it with organic matter and beneficial nutrients. A balanced fertilizer can be mixed into the soil at planting time to give plants a strong start.
What is the best container size for growing healthy pepper plants?
The container size depends on the pepper variety being grown. Compact varieties need pots with a diameter of 6-8 inches, while standard bell peppers require containers 12-14 inches in diameter.
Depth matters as much as width since peppers develop deep taproots. Containers should be at least 8-12 inches deep to accommodate root growth.
Larger containers provide more soil volume, which means better moisture retention and more nutrients available to plants. They also offer greater stability for taller pepper varieties.
Each container must have drainage holes in the bottom. Without proper drainage, excess water accumulates and causes root rot.
How can you support growing peppers in pots to ensure proper growth?
Many pepper varieties benefit from staking or support structures as they grow. Heavy fruit production can cause branches to bend or break without adequate support.
Install stakes, small tomato cages, or bamboo poles when plants reach 8-10 inches tall. Early installation prevents root damage that occurs when stakes are added later.
Tie stems loosely to supports using soft garden ties or strips of cloth. The ties should allow for stem growth and movement while preventing breakage.
Pruning lower leaves improves air circulation around the plant base. This reduces disease risk and directs energy toward fruit production rather than excessive foliage.
What are the common pests or diseases to watch out for when growing peppers in containers and how can you prevent them?
Aphids are small insects that cluster on new growth and under leaves, sucking plant sap and causing distorted growth. Regular inspection helps catch infestations early, and spraying plants with water or applying neem oil controls minor outbreaks.
Whiteflies congregate on leaf undersides and can spread viral diseases. Yellow sticky traps placed near plants capture adult flies and help monitor population levels.
Spider mites create fine webbing on leaves and cause yellowing or bronzing. These pests thrive in hot, dry conditions, so maintaining adequate humidity and rinsing plants with water helps prevent infestations.
Powdery mildew appears as white, powdery spots on leaves and stems. Good air circulation, proper spacing, and avoiding overhead watering reduce the risk of fungal diseases.
Bacterial leaf spot causes dark spots on foliage that can lead to leaf drop. Remove infected leaves immediately, avoid getting foliage wet when watering, and disinfect tools between uses to prevent spread.